Requests for Quotation (new)
Jakamo has released a new application, Requests for Quotations, for sending requests for quotations and making offers within one application. This guide is concering this new application. The Requests for Quotation application will gradually replace the old applications, Offer Requests and Offers, over time.
1. RFQ application and list view
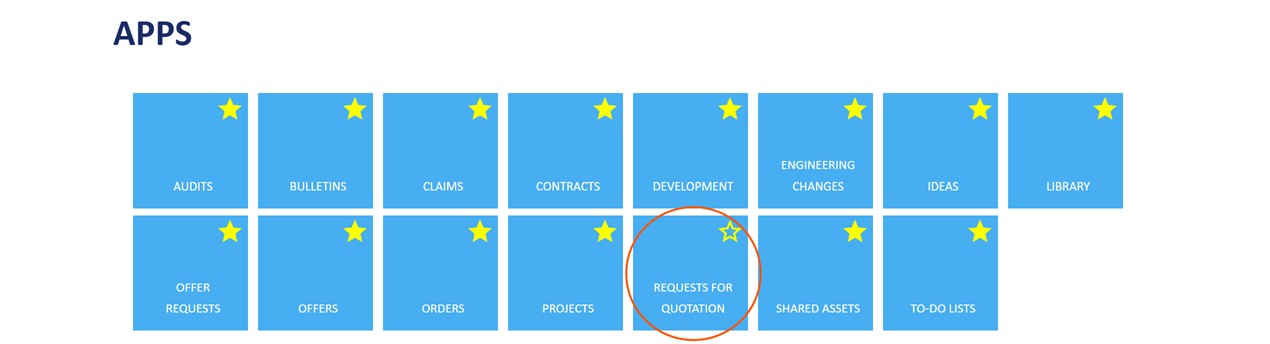
Requests for Quotation application is available in the Apps. It is hidden from the apps list on the left navigation bar, but is available in the Apps grid.
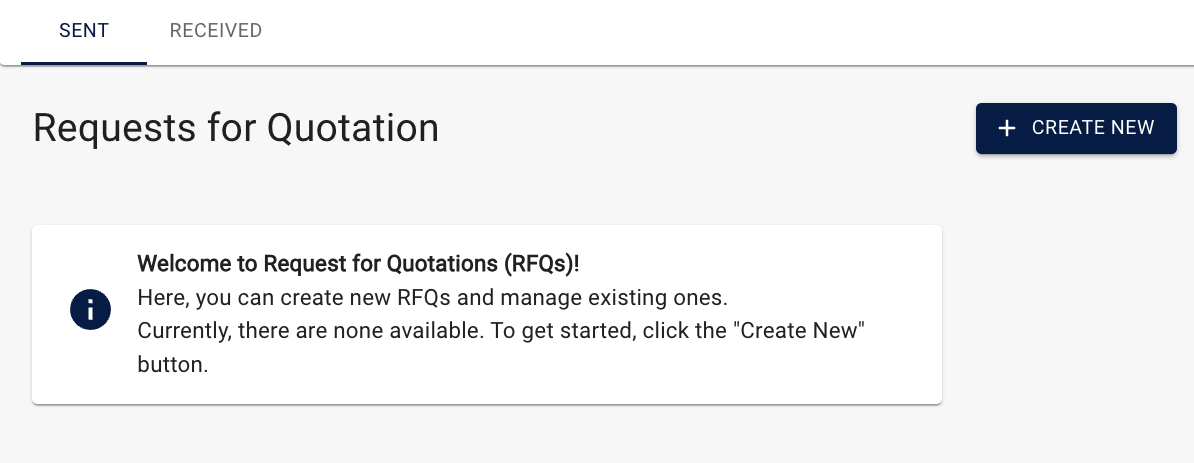
In the application list view you can see the overview of your RFQs:
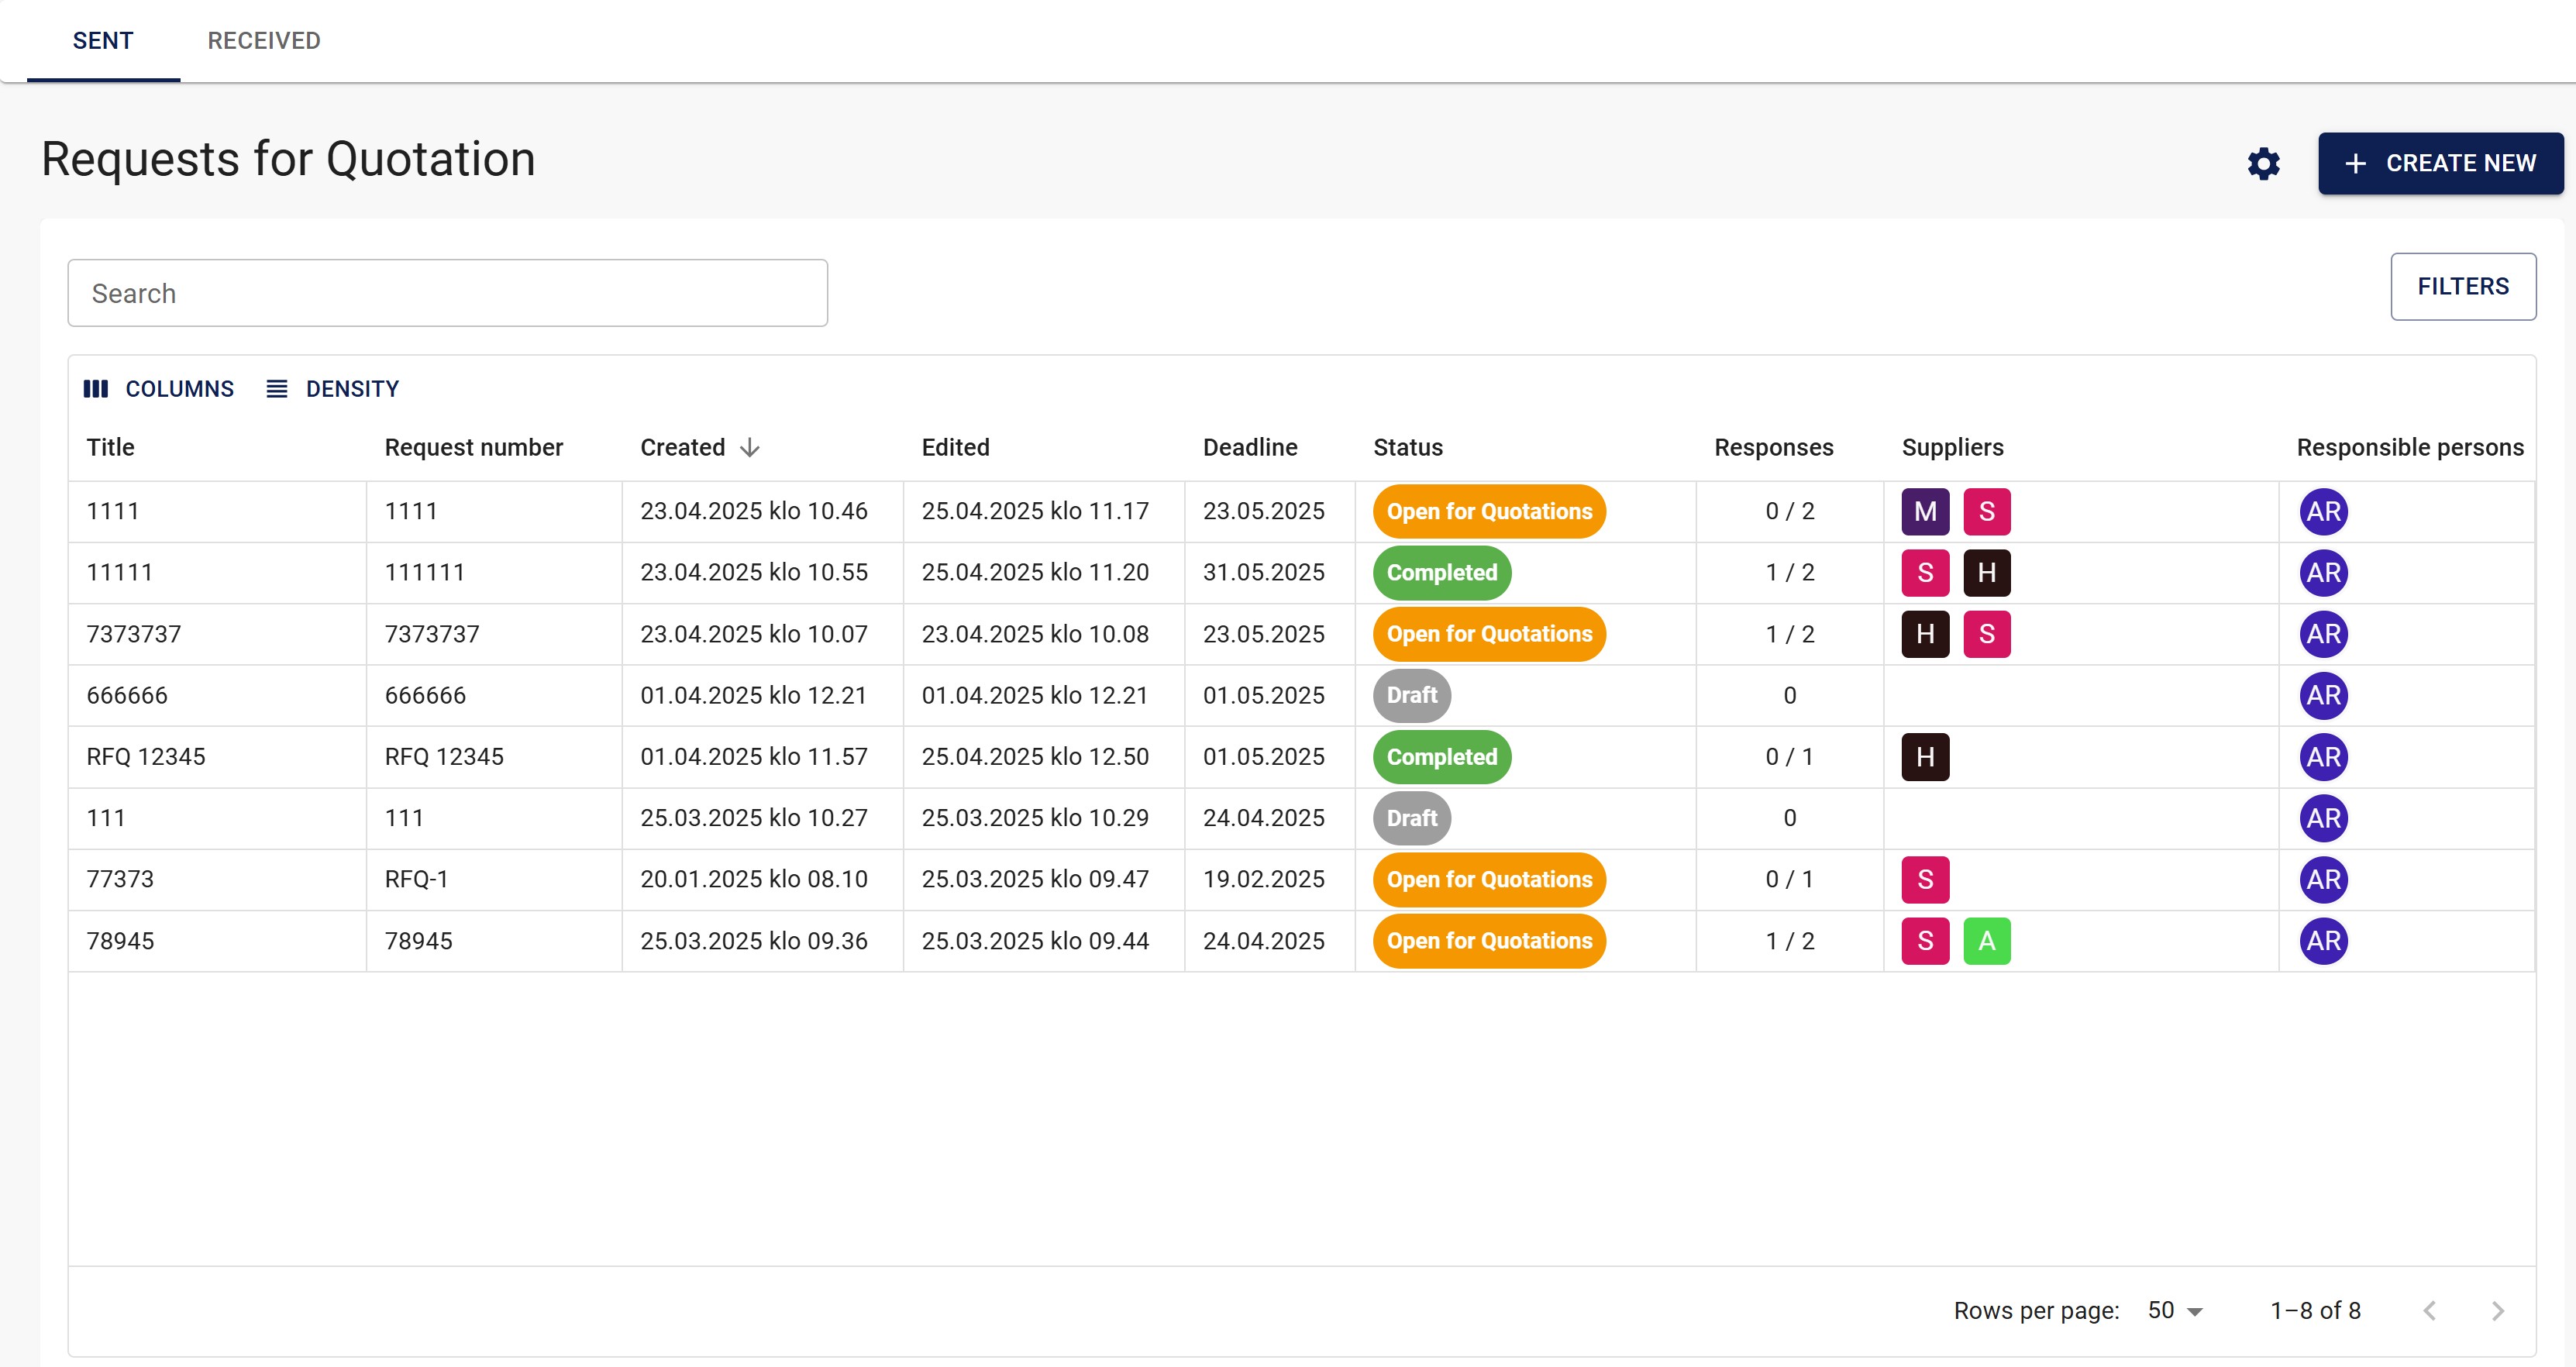
From COLUMNS selection you may show or hide following details of your RFQs:
- Title: Title of the RFQ.
- Request number: The unique offer request number of the RFQ.
- Created: When the RFQ was created.
- Edited: When the RFQ was edited the last time.
- Deadline: Deadline for submitting offers. Suppliers may still submit after the deadline, but their offer will be marked as a late submission.
- Status: Status of the RFQ. RFQ statuses are: Draft, Open for Quotations, Ready to Award, Completed, Cancelled and Archived. Please note that there are different statuses for offers.
- Responses: This number indicates the number of responses received from the total number of suppliers involved in this RFQ. The first number represents the responses received, and the second number represents the total number of suppliers this RFQ is shared.
- Suppliers: All the suppliers listed this RFQ is shared with. Icon dispalys the first alphabet of the supplier, and by hovering the icon the name of supplier is visible.
- Resposible persons: Contact persons from the customer company.
2. Creating the RFQ - customer's view
2.1 Create new RFQ
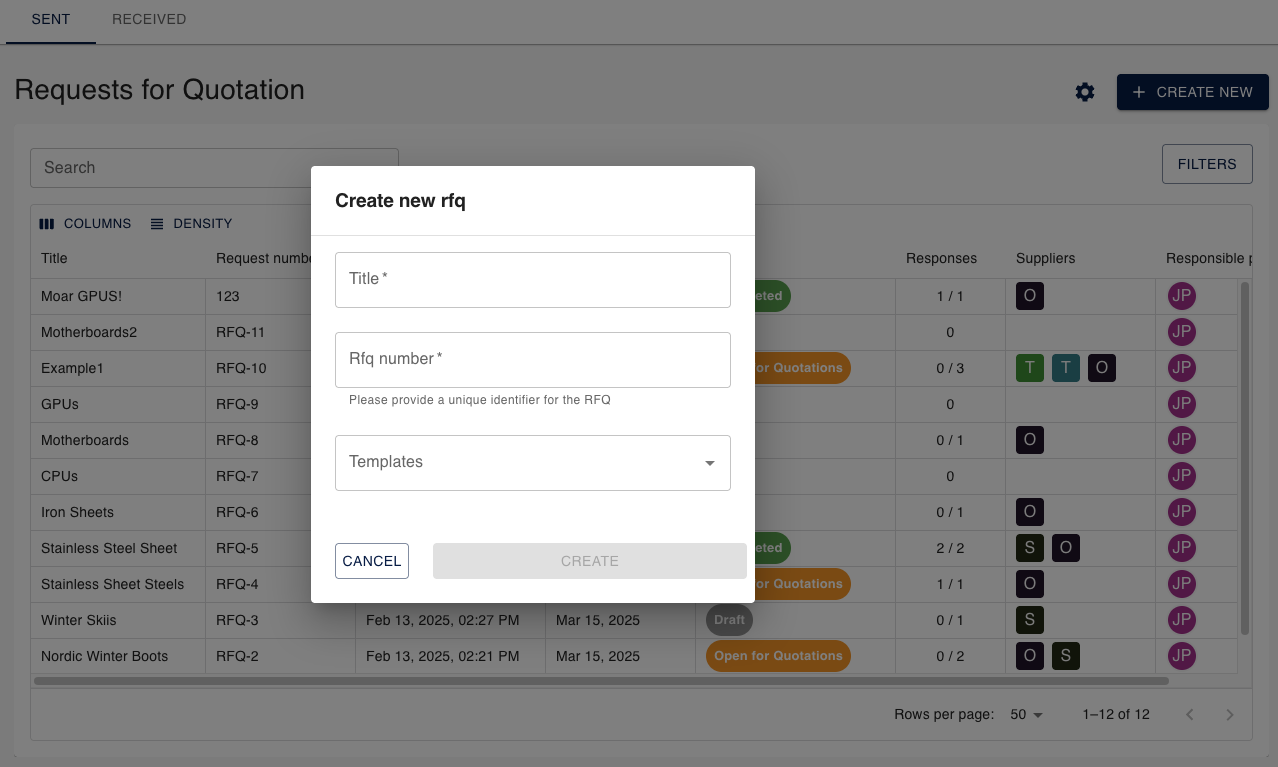
Start creating new RFQ with + CREATE NEW on the top-right of the list view:
- Title: Create fitting title for your RFQ
- Rfq number: Provide a unique identifier for the RFQ
- Business unit: Select your Jakamo business unit this RFQ is created from
- Templates: Select if you want to utilize any pre-made template
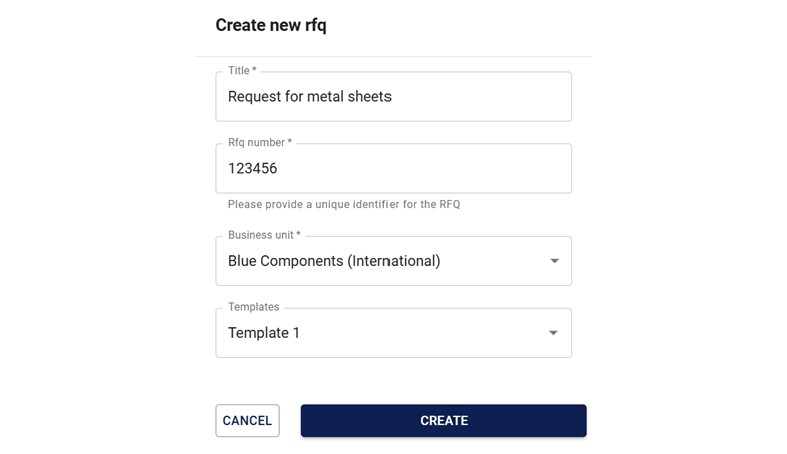
- Create: Start creating the RFQ after fulfilling mandatory information (title and rfq number, possibly also business unit).
When editing the RFQs, there is an autosave feature that keeps the record saved automatically to their latest stage. This enables you to focus on filling the RFQ details and not worrying if the RFQ has saved or not.
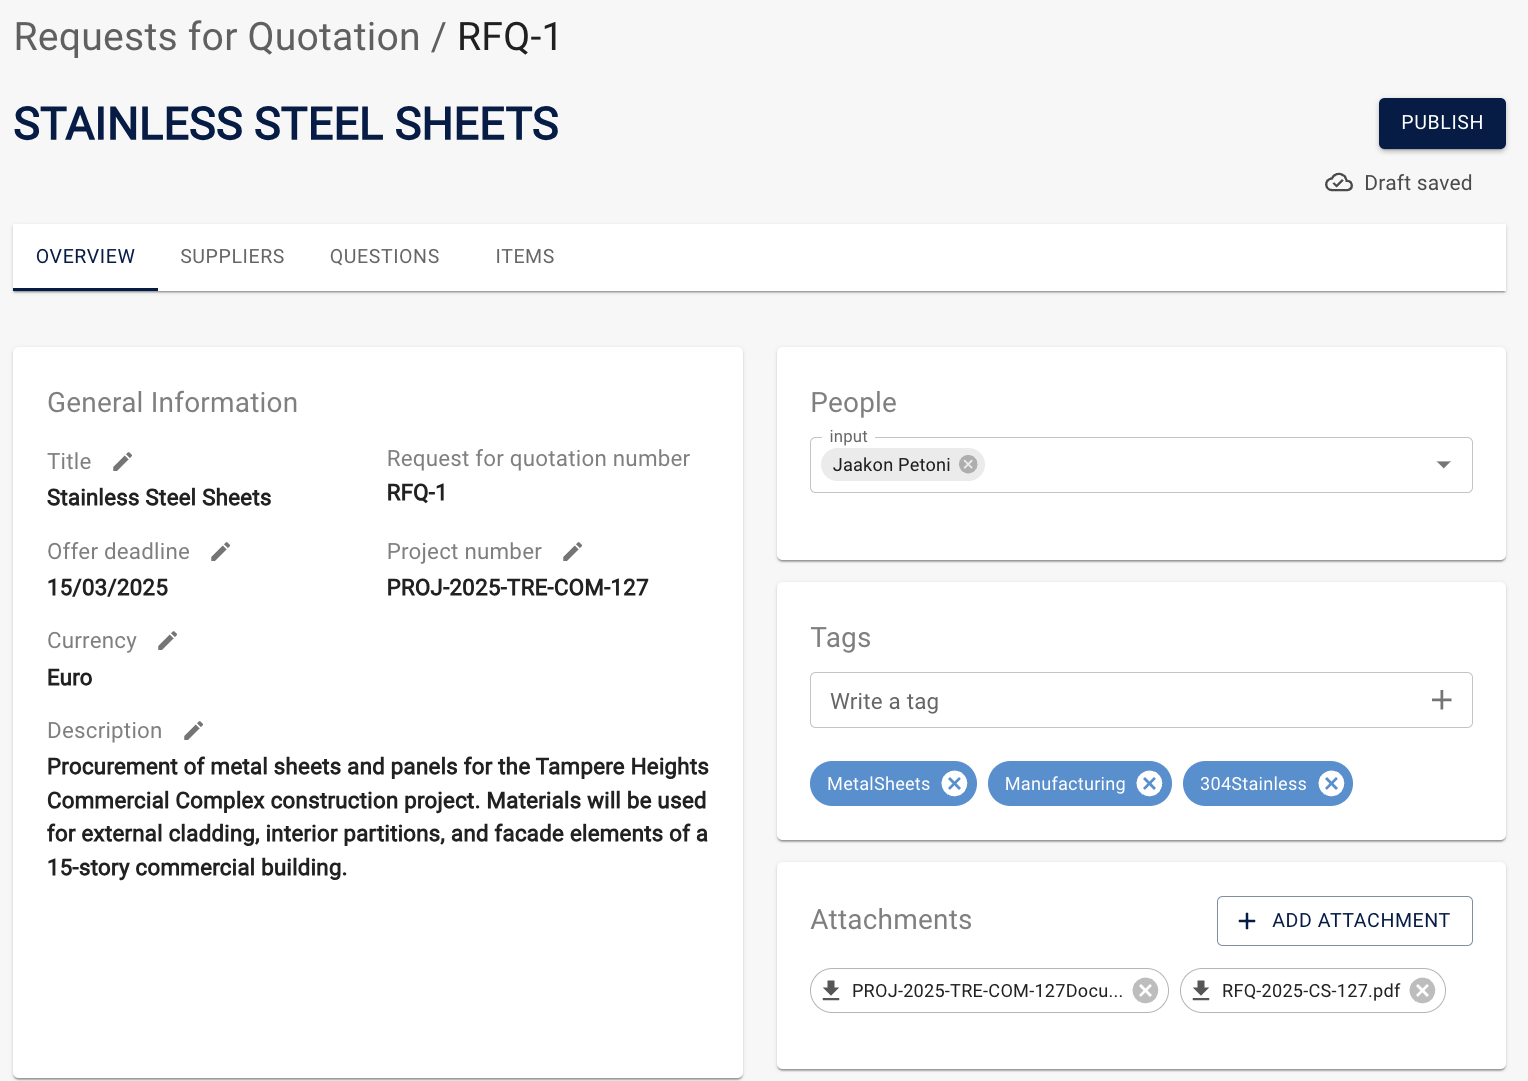
2.2 General information of the RFQ
In the Overview tab is presented all the basic information about the RFQ:
- Title: You can see and adjust the title.
- Request for quotation number: The RFQ number was generated when you created the RFQ.
- Offer deadline: Define the last date when suppliers should reply to RFQ. Suppliers may still submit after the deadline, but their offer will be marked as a late submission.
- Currency: Select the currency of your RFQ. Default currency is Euro.
- Description: Write here the general description of the RFQ.
- Project number: Add project number if RFQ is related to a certain project.
- Business unit: Select which of your business unit this RFQ is located. This selection is available only if company has BUs enabled in Jakamo. Only one BU can be selected.
- People: Select amongst your colleagues persons involved in this RFQ. You can add multiple persons.
- Attachments. You may add several attachments related to RFQ here. In Items there is a place to add item-spesific attachments.
- Internal tags: Add one or more internal tags to help categorize the RFQs. Prefer using predefined tag groups to avoid typing the tags manually. Internal tags are not shared with suppliers.
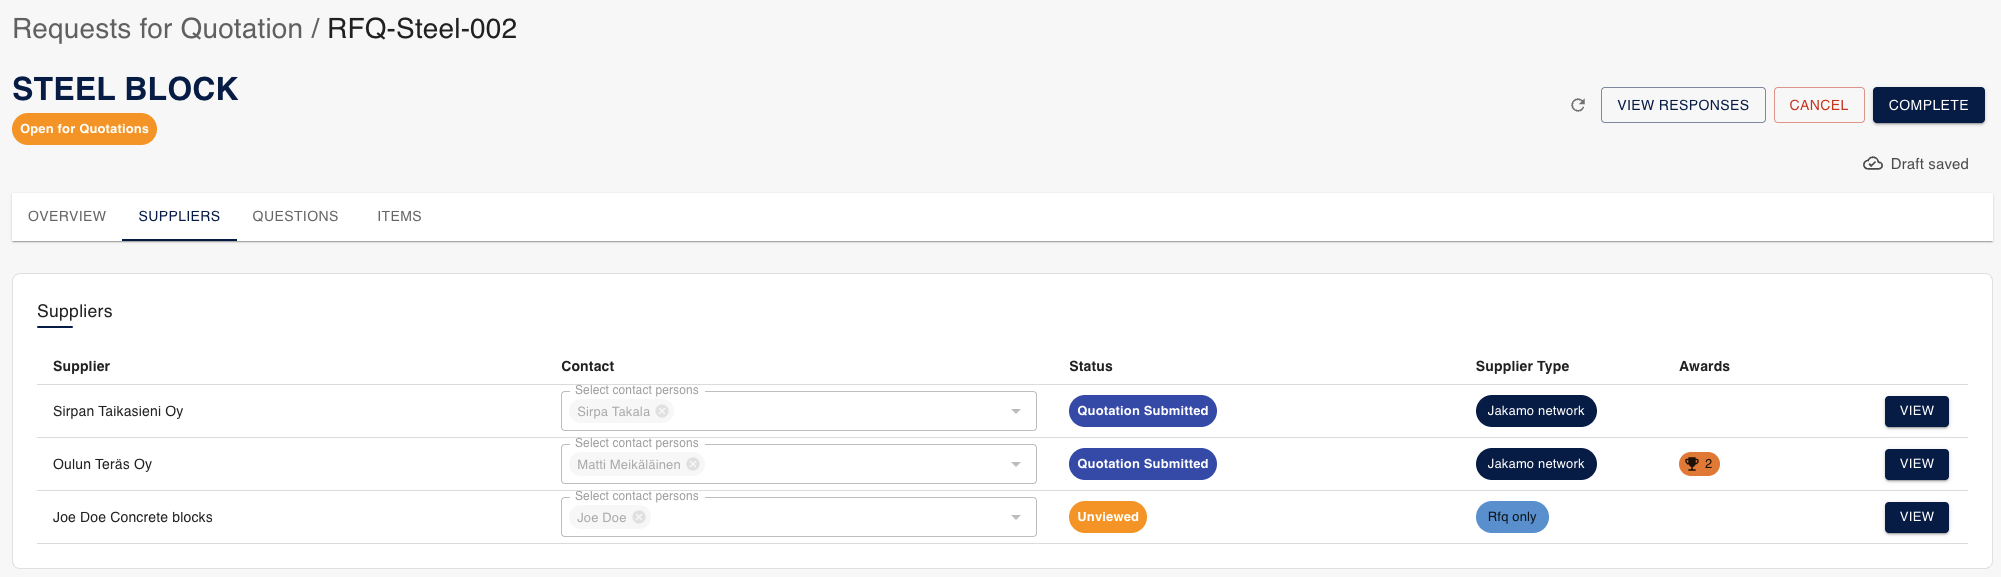
2.3 Supplier selection
Suppliers tab in the RFQ is a place to share RFQs with selected suppliers and view status of their offers.

1. Supplier: Select your supplier or suppliers you want to share the RFQ. You have three options:
- Jakamo partners: Select from your existing Jakamo network partners
- Master Data suppliers: Choose from your supplier profiles in Master Data
- RFQ-only suppliers: Add suppliers that exist in the RFQ system but are not part of your formal Master Data
2. Contact: Select contact persons of the RFQ from the supplier:
- Jakamo partners: Select amongst their Jakamo users
- Master Data suppliers: Select the contact person's email defined in External sharing email of the supplier's profile
- RFQ-only suppliers: Select from their defined contact persons or edit their contact details
3. Status: Status indicates the phase of the supplier's response. Supplier's offer's statuses can be: Unpublished, Unviewed, Viewed, Quotation started, Quotation submitted, Withdrawn, Quotation Evaluated, or Declined by supplier.
4. Supplier type: This indicates the supplier's origin:
- Jakamo network: Suppliers from your Jakamo partner network
- Master Data: Suppliers from your internal supplier database
- Rfq only: Suppliers that exist in the RFQ system but are not part of your formal supplier management database
5. View: You can view supplier's offer there once it has been submitted. Private discussion with supplier is also available there.
Adding RFQ-Only Suppliers
RFQ-only suppliers are those that exist within the Jakamo RFQ system but are not part of your formal Master Data supplier management. These suppliers can be used across multiple RFQs but remain separate from your core supplier database. This is useful for:
- Occasional suppliers for specific projects
- Testing new suppliers before adding them to Master Data
- External suppliers you work with irregularly
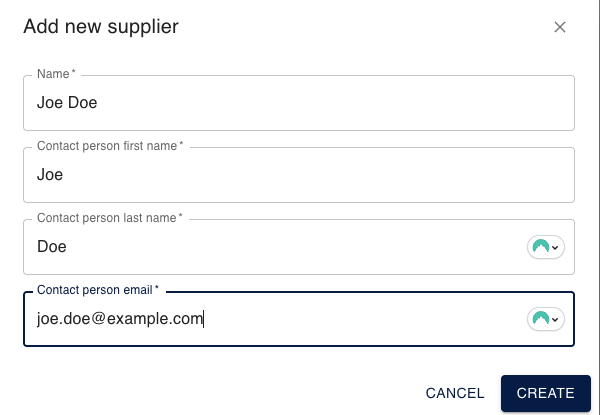
To add an RFQ-only supplier:
-
Type the supplier name in the search field
-
If no existing supplier matches, you'll see an option to create a new RFQ-only supplier
-
Fill in the required information:
- Name: Company name of the supplier
- Contact person first name: First name of the contact person
- Contact person last name: Last name of the contact person
- Contact person email: Email address where the RFQ will be sent
-
Click
SAVEto add the supplier
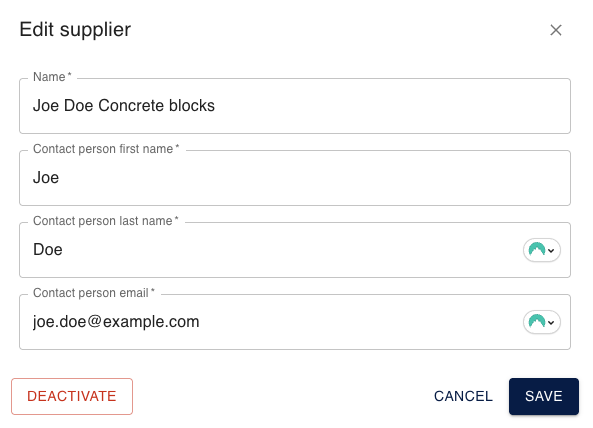
Important notes about RFQ-only suppliers:
- They can be reused across multiple RFQs once created
- They can be edited or deactivated within each RFQ
- They remain separate from your Master Data supplier management
- They receive the same RFQ notifications and have the same response capabilities as other supplier types
- They appear in supplier searches for future RFQs
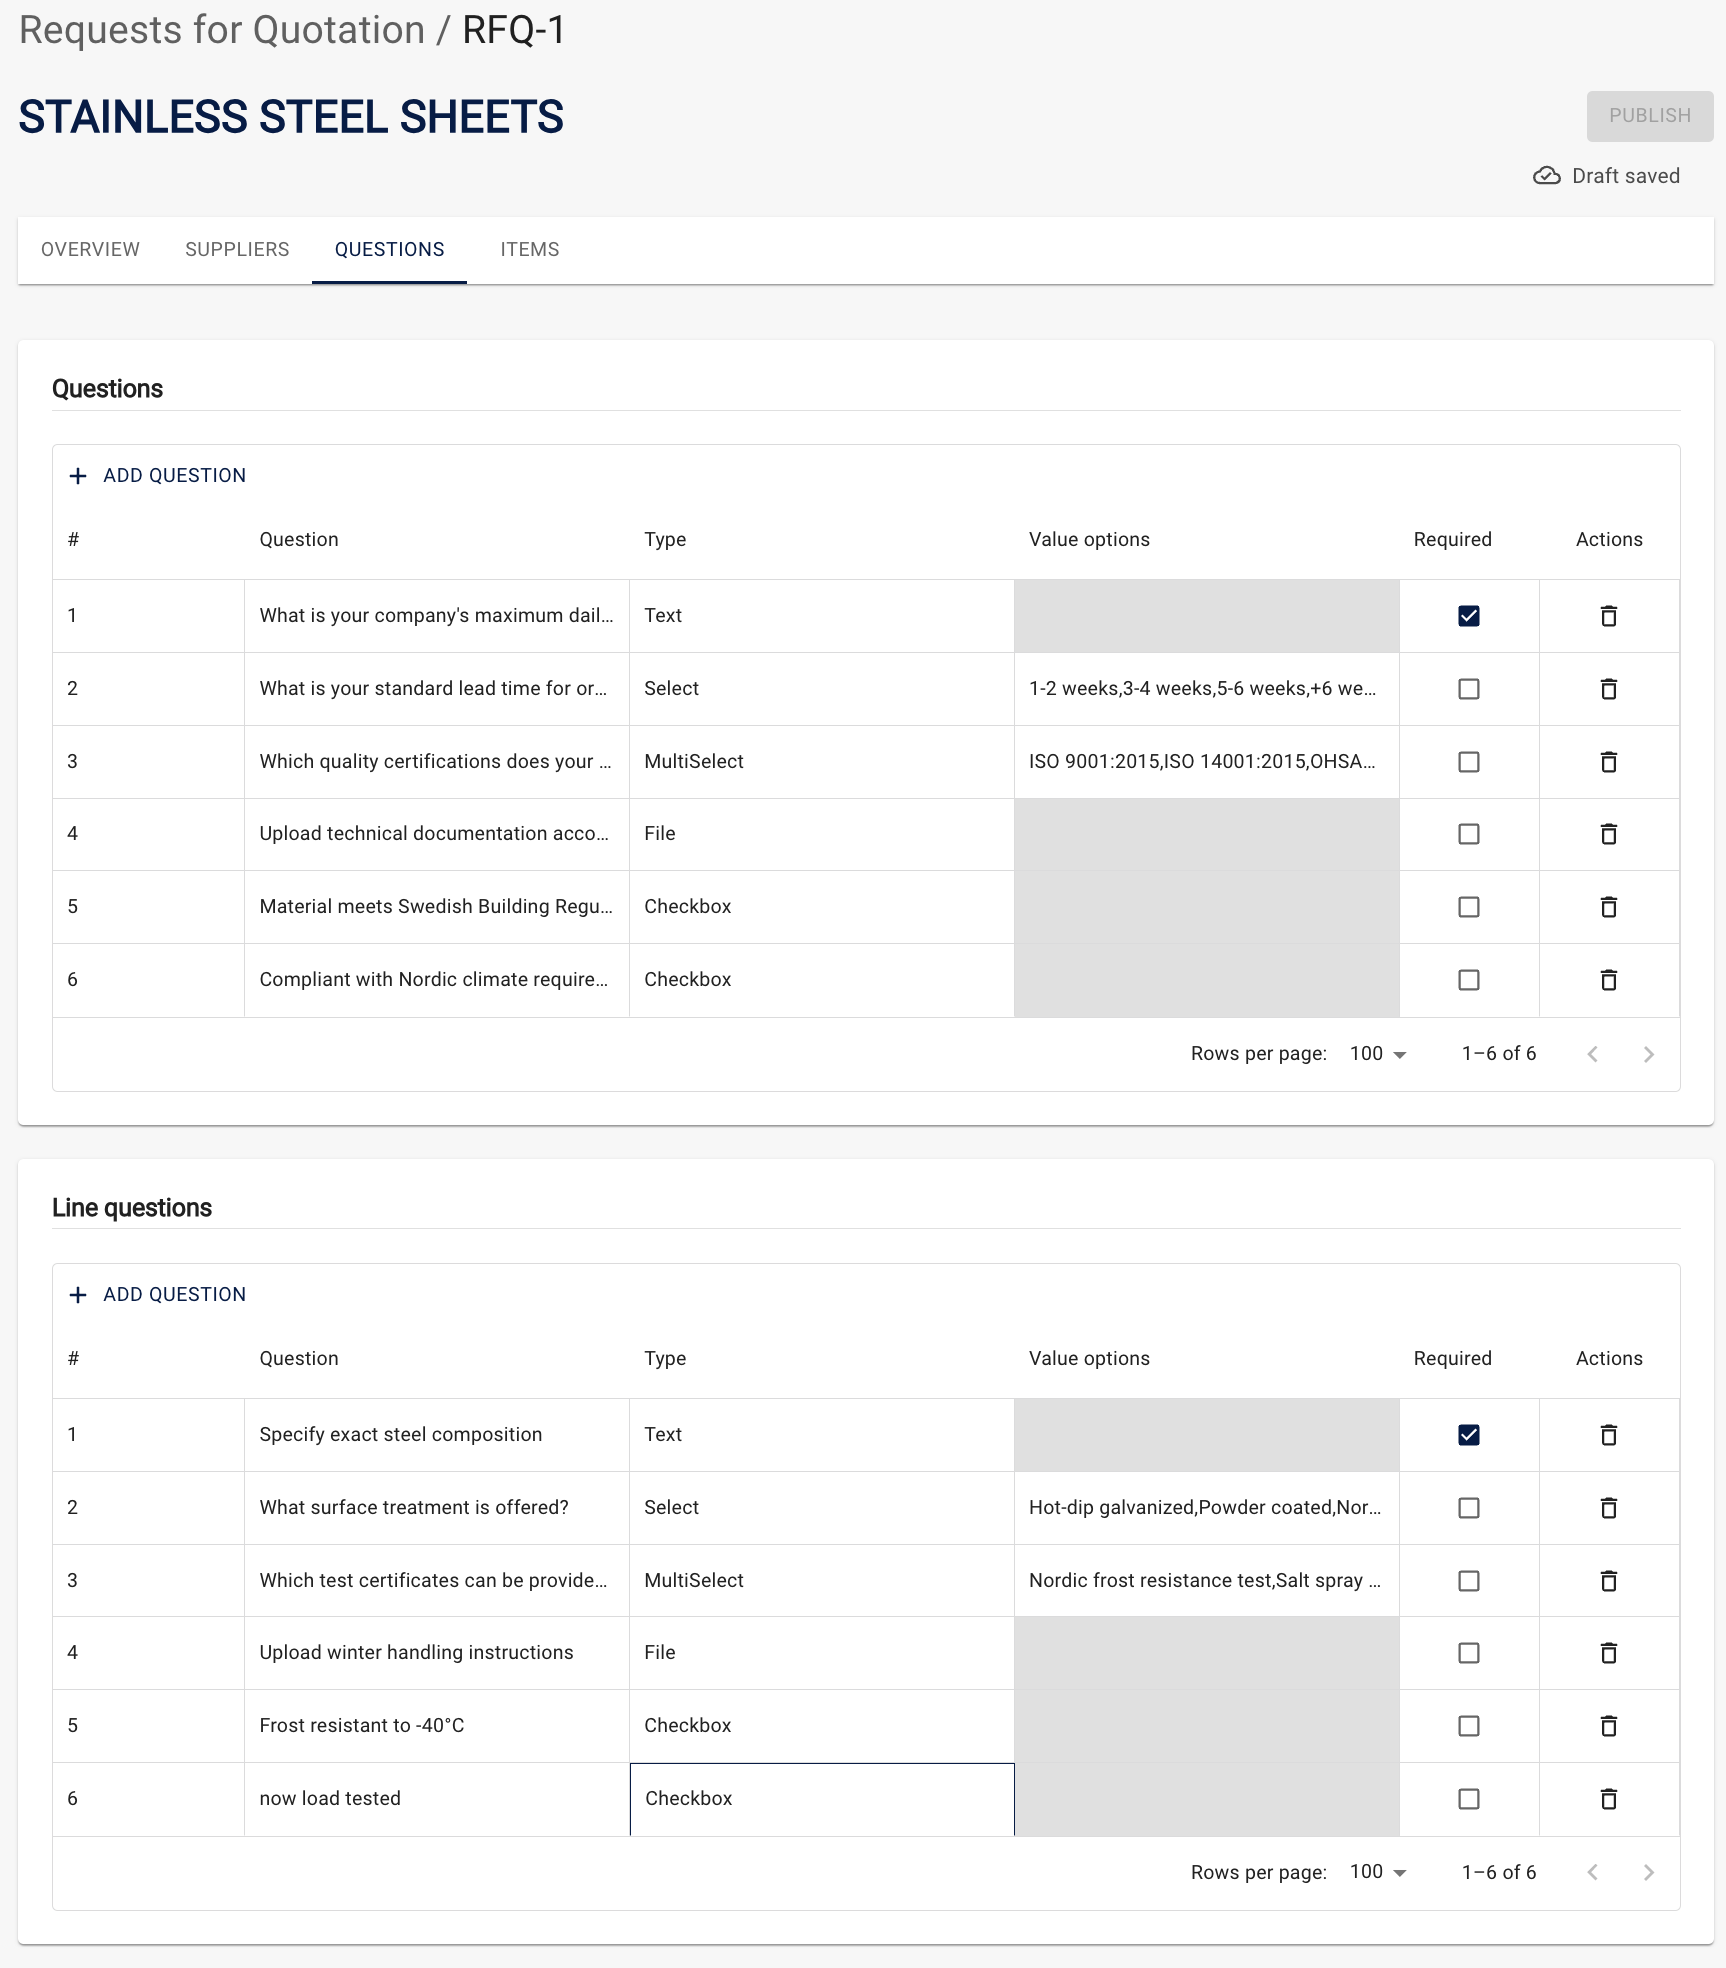
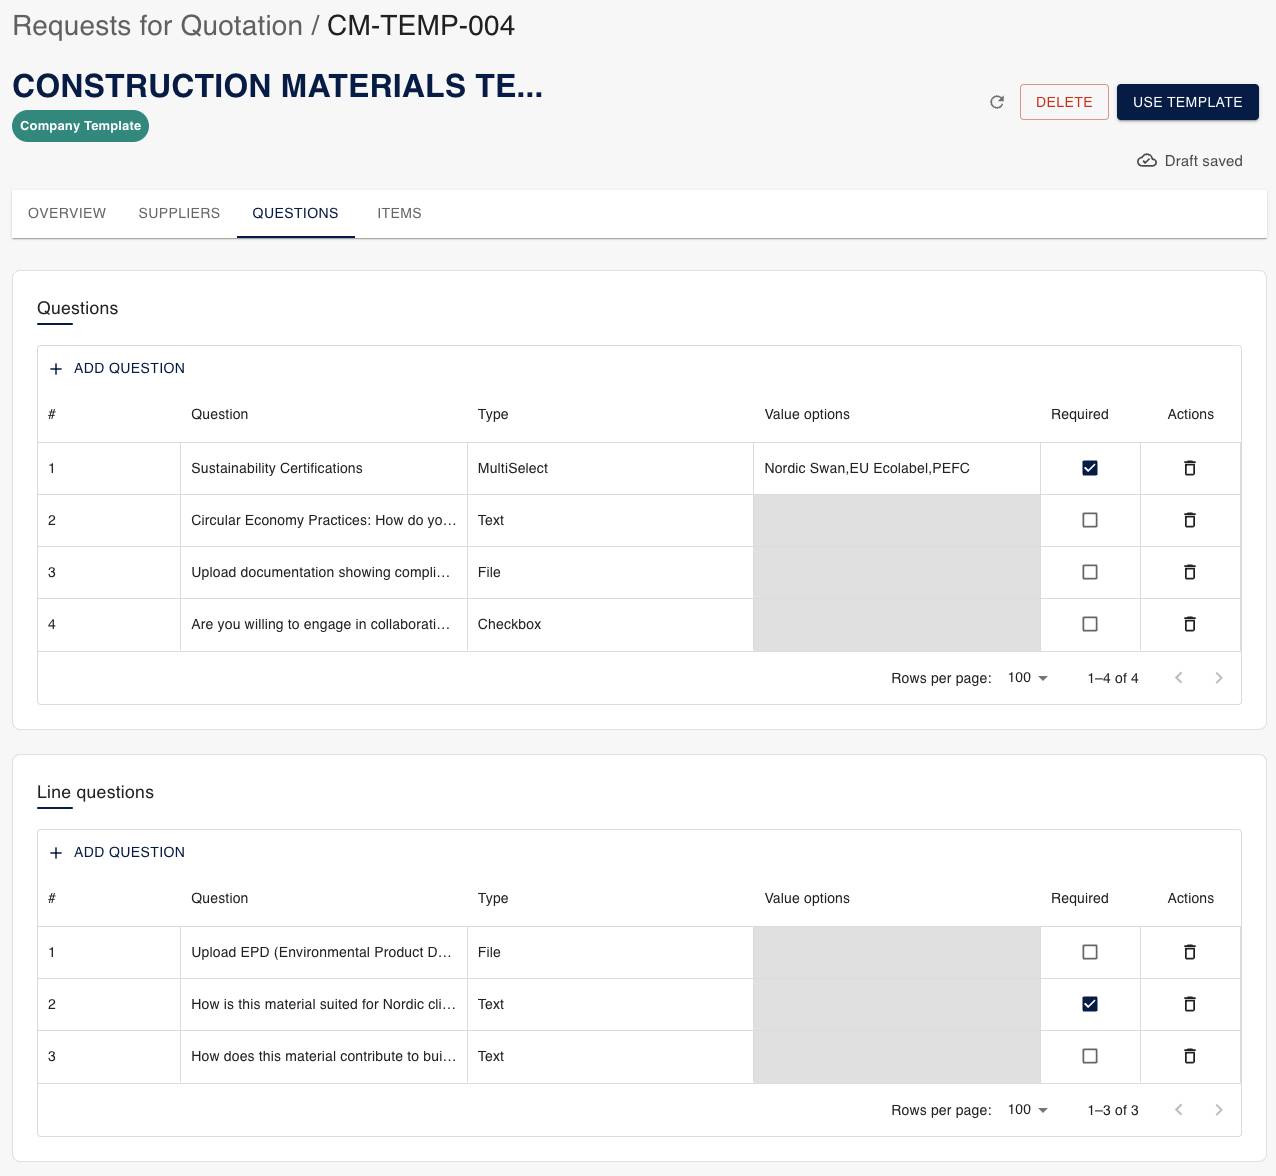
2.4 RFQ questions
Here you can create all the RFQ-spesific questions that will be delivered to suppliers in the same format. You can ask these question per whole RFQ and/or per offer request line.
Question types can be in text, select, multiselect, file or checkbox format. value options is dedicated for customer to pre-define answers, for example, for creating pre-made options for multiselect type of question.
RFQ creator can also require some of the fields to be filled by selecting tickbox Required. If the required button is not selected, supplier may skip that question.
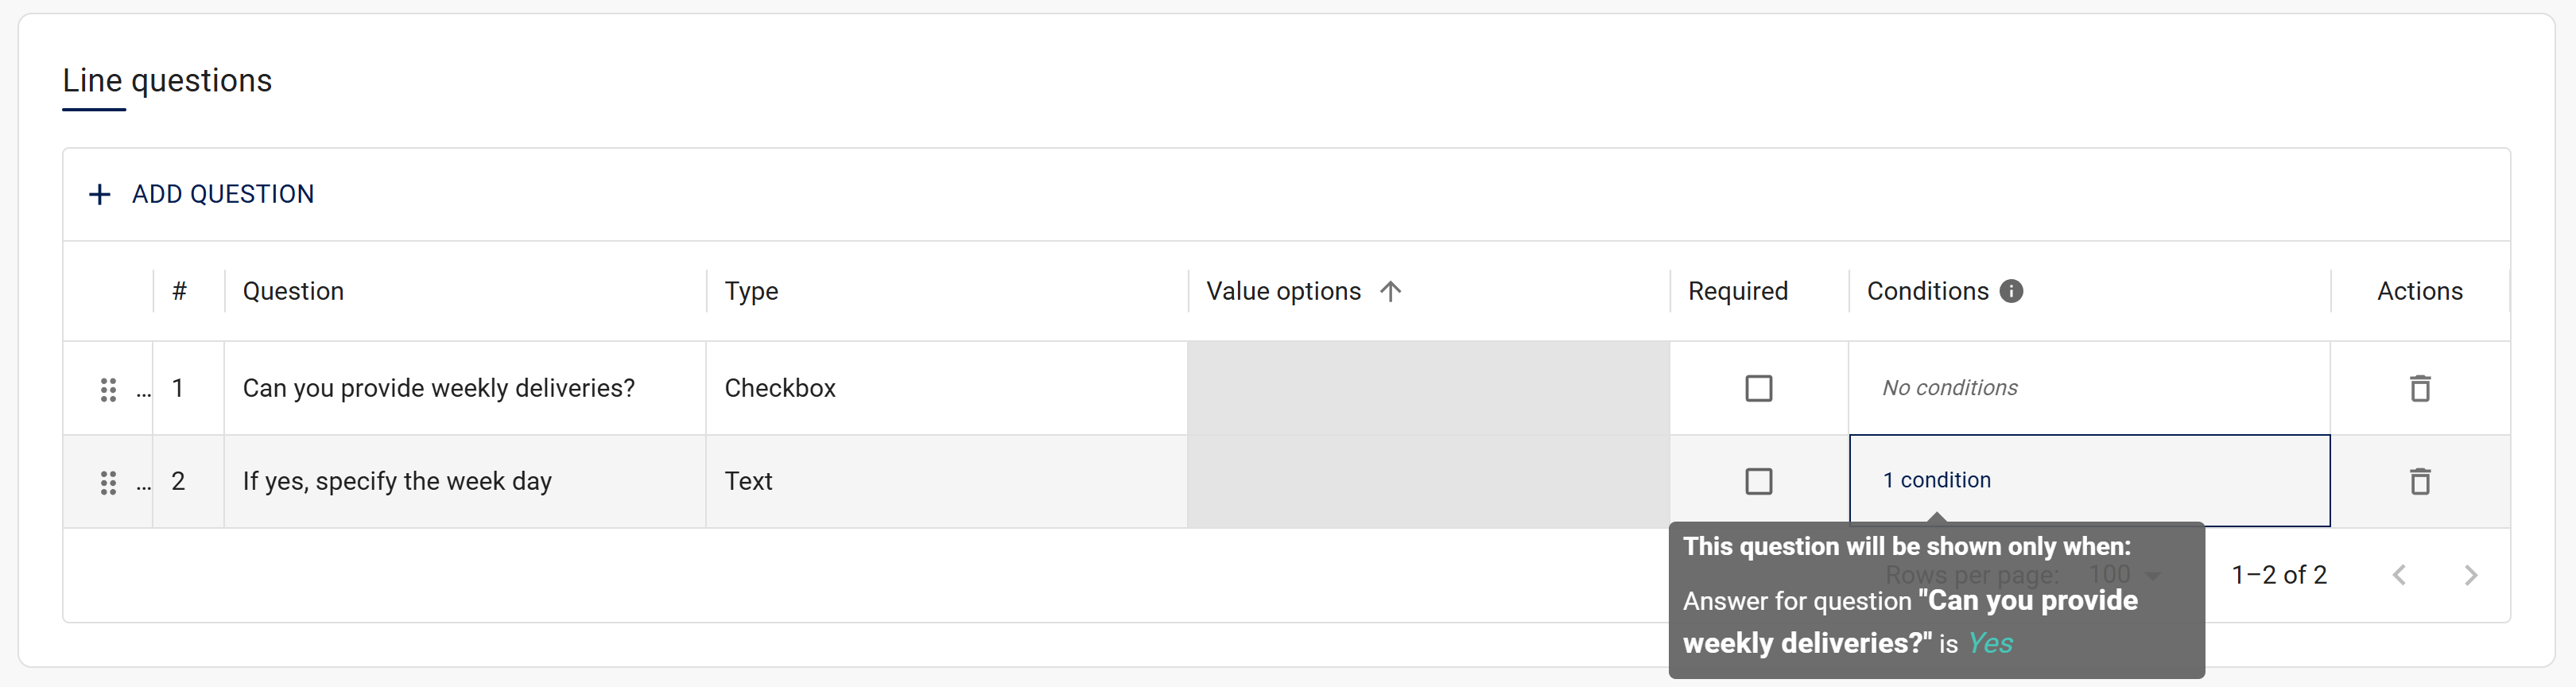
Conditional Questions
Conditional questions appear only when all conditions match the specified answers, letting you build dynamic questions that adapt to user responses. All RFQ question tables include a Conditions column. Use this column to specify when a question is related to some other question's answer and should be shown. Conditions can be created based on answers to Checkbox type questions. Only AND logic is supported. If several questions are set as condition, all conditions must be true for activation.
Example of the line question 2 depending on the line question 1 (if Yes, open line question 2):
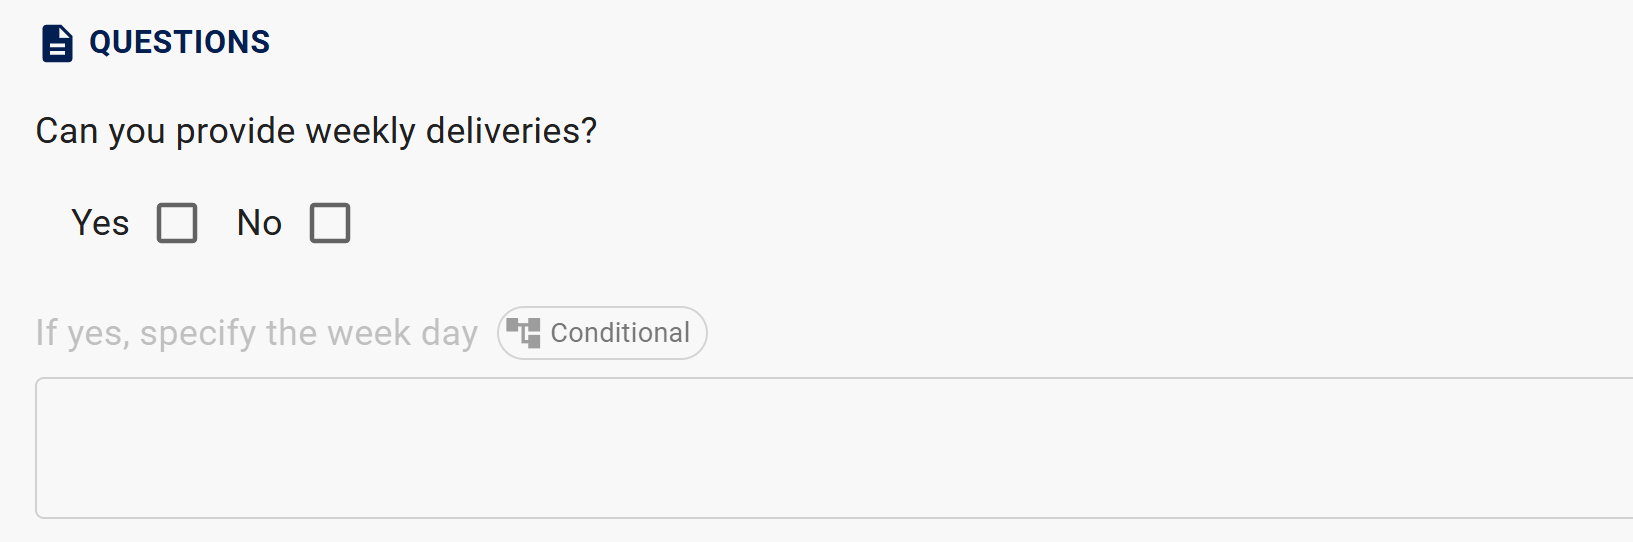
How Suppliers See Conditional Questions
- Inactive questions are greyed out when conditions are not met
- Conditional badge indicates dependencies (hover to view)
2.5 RFQ items
In the Items tab the customer adds the requested items by adding them manually from + ADD ROW or by importing rows from the excel from IMPORT ROWS.
Some information is requested as default:
- Item No.: What's the article / item number from customers system
- Item Name: what's the article requested
- Quantities: in what quantites customer wants the goods to be delivered
- Unit: PCS as default but customer can define this by themselves
- Attachements: Customer may attach multiple attachments per offer request line

In addition, customer can request pre-defined information for all items by selecting CHOOSE REQUESTED FIELDS:
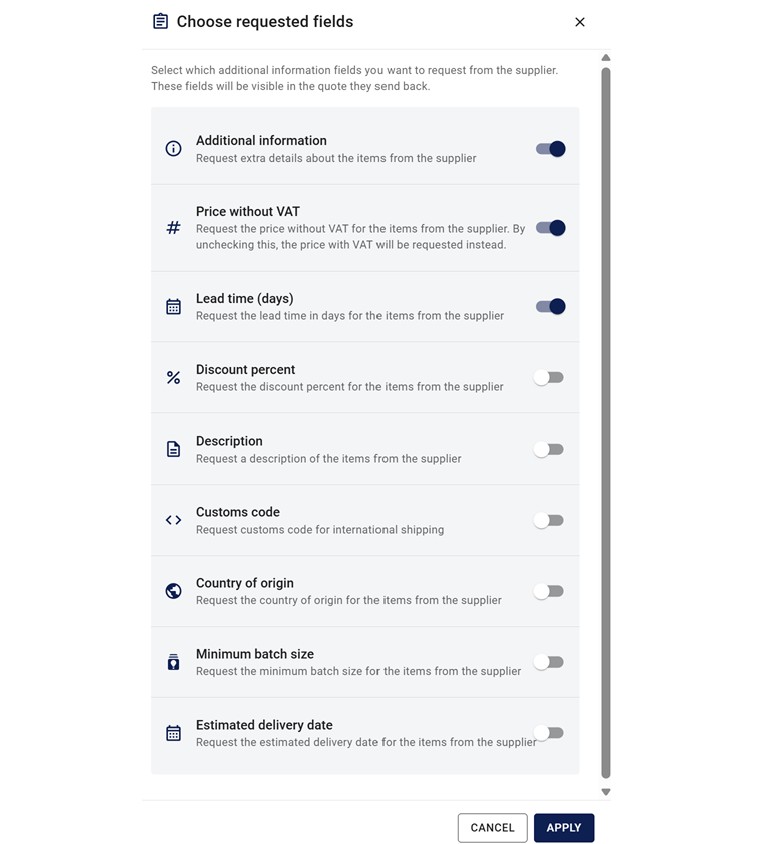
As a default, Additional information, Price without VAT and Lead time (days) are selected to be included for each offer request line, but customer can select which information are requested to be fulfilled by supplier for each item.
2.6 Importing Items from Excel
For larger RFQs with multiple items, you can import items directly from Excel using the IMPORT ROWS function. This streamlines the process of adding many items at once.
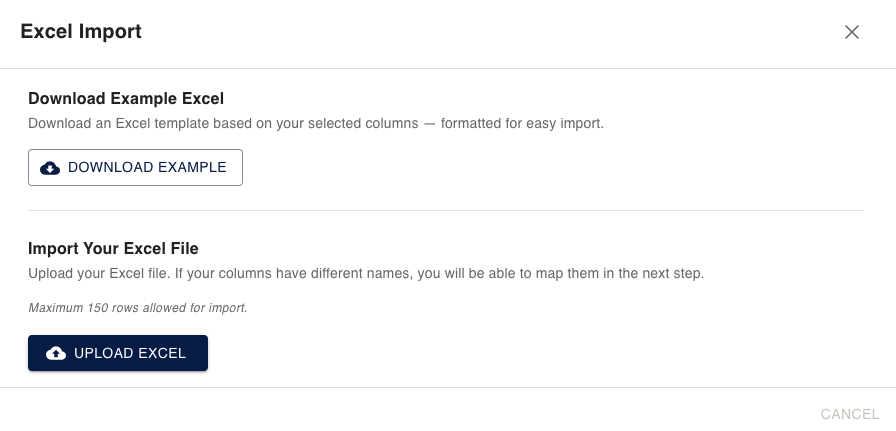
Step 1: Download Excel Template
Click DOWNLOAD EXAMPLE to get a pre-formatted Excel template with the correct column structure:
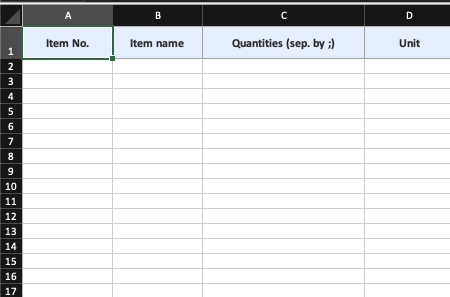
The template includes the standard columns:
- Item No.: Your internal item/article number
- Item name: Description of the requested item
- Quantities (sep. by ;): Quantity needed (use a semicolon (;) to separate multiple quantities you want to request pricing for)
- Unit: Unit of measurement (PCS, KG, M, etc.)
Step 2: Prepare Your Excel File
Fill in your Excel file with the items you want to request. The system supports up to 150 rows per import.
Step 3: Upload and Map Columns
Click UPLOAD EXCEL and select your file. The system will automatically map Excel columns to RFQ fields based on column names:

If your Excel file uses different column names, you can manually map them to the correct RFQ fields. All required fields must be mapped before proceeding.
Step 4: Preview and Confirm
Review your import data before finalizing:
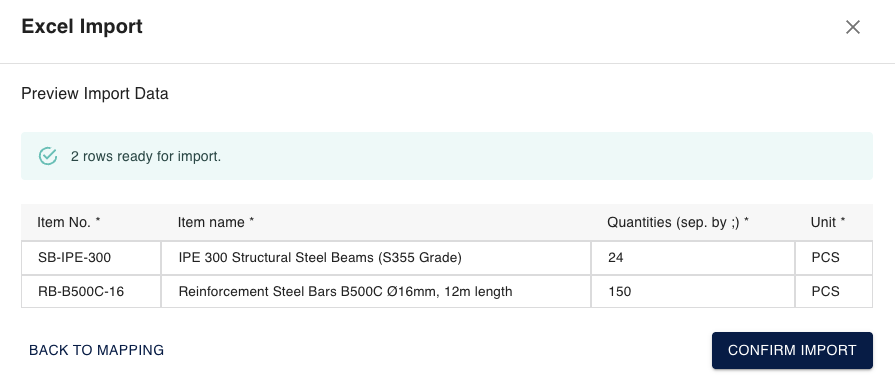
The preview shows exactly what will be imported, including any data validation results. Click CONFIRM IMPORT to add the items to your RFQ.
Step 5: Imported Items
Once imported, the items appear in your RFQ items list and can be edited individually if needed:
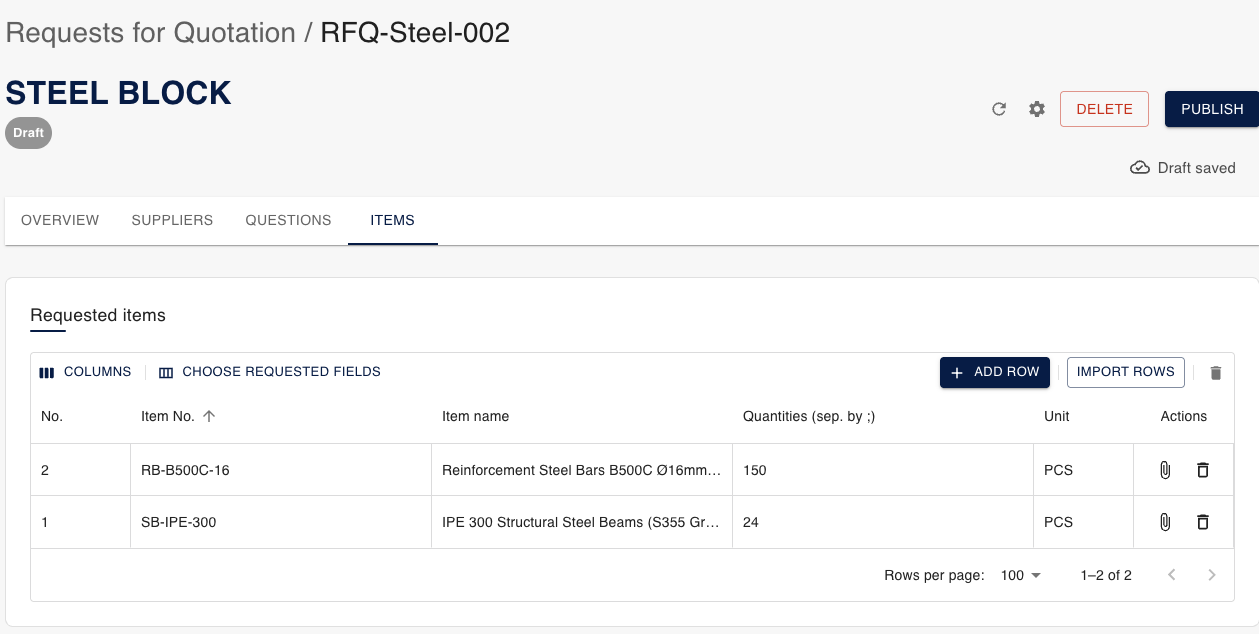
- Keep column names consistent with the template for automatic mapping
- Use clear, descriptive item names for suppliers
- Include units that suppliers will understand
2.7 Publish new RFQ
After all details are filled, it is time to publish the RFQ and share it with selected suppliers. Select PUBLISH on the top right corner of the RFQ.
Confirm Publish Dialog
Before publishing, you'll see a confirmation dialog where you can add a personalized message to suppliers:
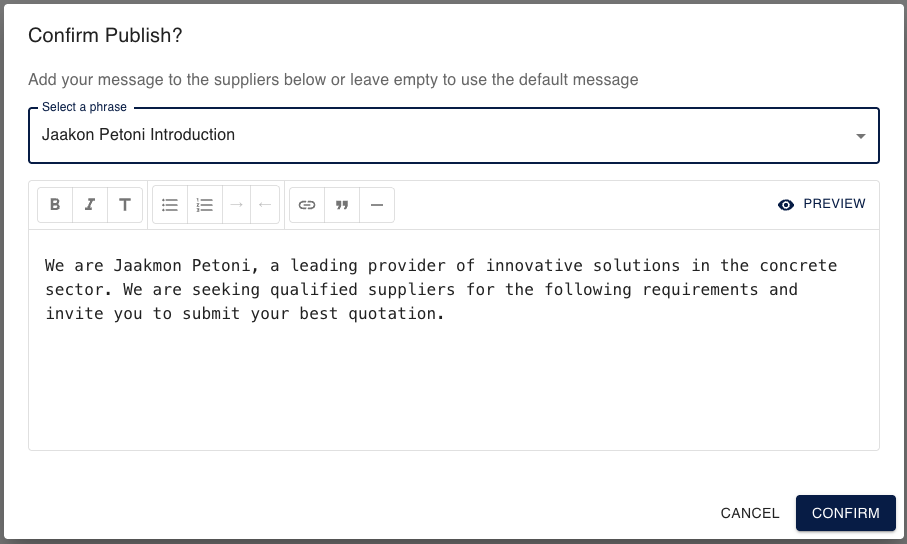
Adding Your Message:
- Select a phrase: Choose from your saved phrases using the dropdown menu. This will populate the message field with your pre-written content.
- Custom message: You can write a custom message using the rich text editor, or modify the selected phrase.
- Default message: Leave empty to use the system's default message.
Message Editor Features:
- Rich text formatting: Bold, italic, underline text
- Lists: Create bulleted or numbered lists
- Links: Add hyperlinks to relevant documents or websites
- Preview: Use the
PREVIEWbutton to see how your message will appear to suppliers
Click CONFIRM to publish the RFQ and send it to all selected suppliers.
What happens after the RFQ is published?
- RFQ for customers: All the fields in the RFQ form will be locked so the information cannot be altered afterwards.
- RFQ sent: RFQ will be sent to all suppliers selected in the Suppliers tab with your personalized message. The best way to get an overview of the all sent RFQs is to go to the RFQ list view.
- Status update: The RFQ status changes to Open for quotations.
- Supplier notifications: Each supplier receives an email notification with the RFQ details and your personalized message.
2.8 Edit published RFQ
You can edit a sent RFQ by opening the RFQ and selecting EDIT from the top right corner. This will open the RFQ in edit mode, where you can make the necessary changes, such as adding a new supplier to the RFQ sharing or adding new RFQ lines. Publish your changes by re-publishing the RFQ by selecting PUBLISH. When publishing, include a message describing what you have changed.
Adding new suppliers to already published RFQ
If you add a new supplier to the RFQ sharing list, you can write a separate message for that supplier (or those suppliers) before re-publishing the RFQ. After that, you can also define a message for the suppliers who already have access to the RFQ.
Only suppliers newly added to the RFQ will receive an email notification.
2.9 Create a copy of the existing RFQ
After creating a RFQ copy of it can be made. Select Settings from top right corner and select Copy this RFQ. That action will create a new RFQ which is a cope of the existing one, including attachments, line attachments, and suppliers.
3. Received new RFQ - supplier's view
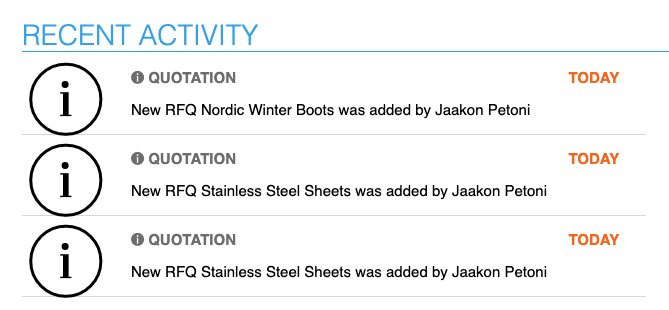
The supplier will get notified about a new offer request in Jakamo. They can access it either from their Jakamo dashboard, from the email notification link, or directly from the Requests for Quotations application.
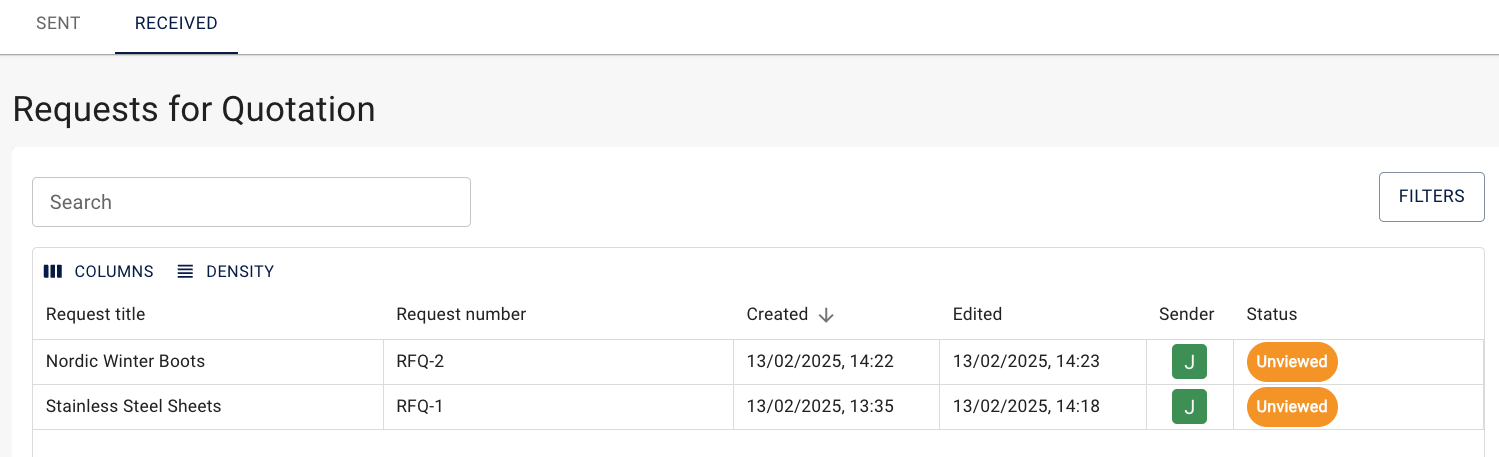
In the Requests for Quotation application list view Received tab they can be seen the request for quotations they have received from their customers.
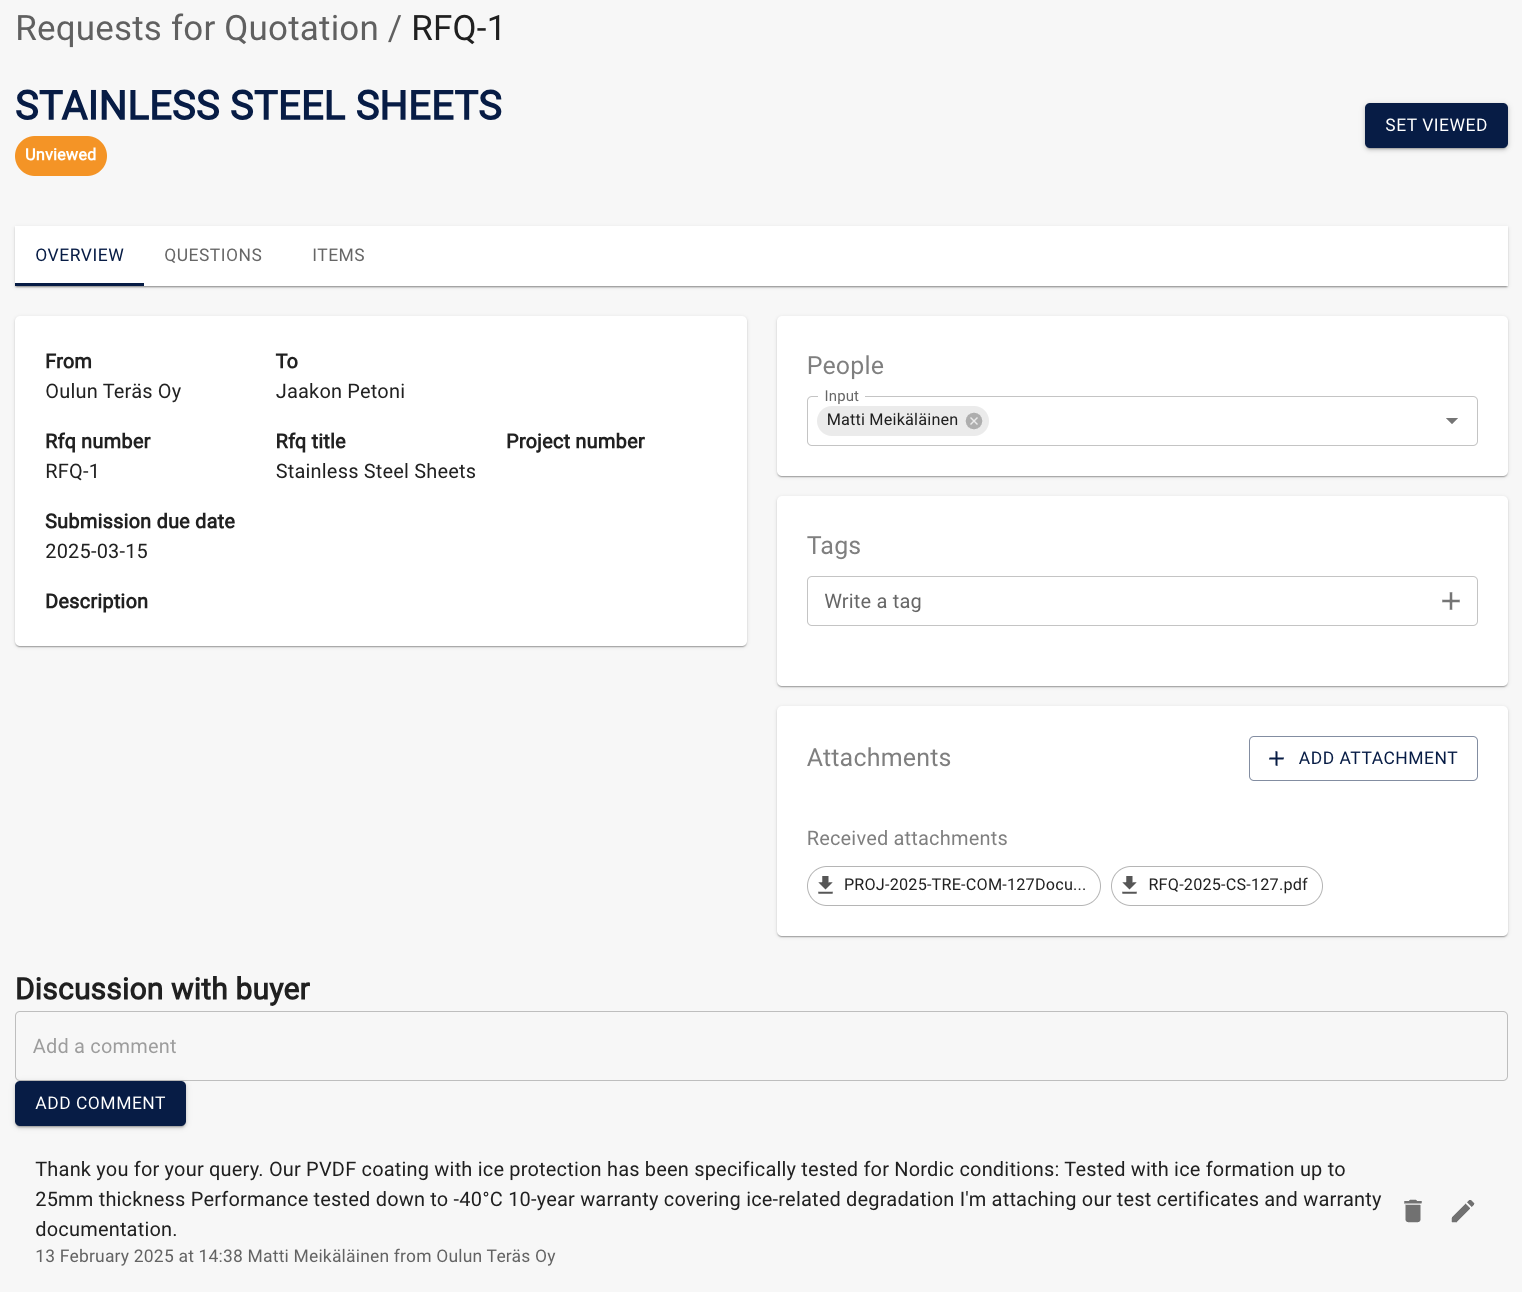
3.1 RFQ overview from supplier's perspective
When the supplier opens the RFQ, Jakamo will automatically change its status to Viewed to inform the customer that the supplier has received and seen the RFQ.
Download Options
Before starting your quotation, you can download the RFQ for offline review, internal sharing, or record-keeping purposes:
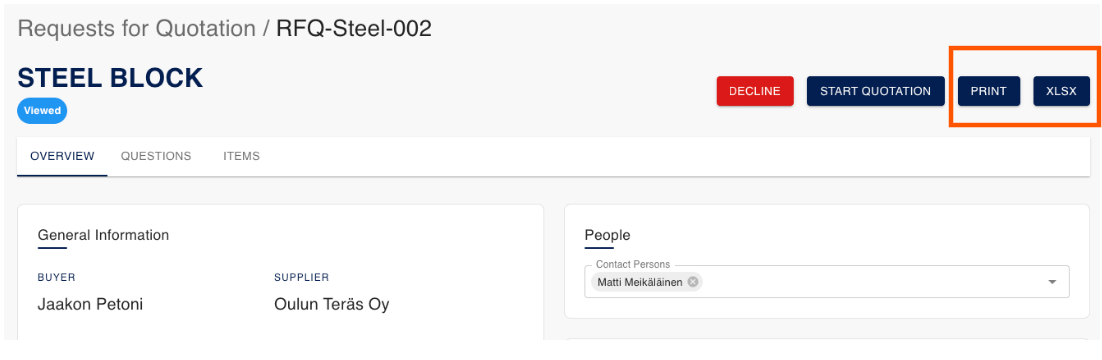
PRINT (PDF Download)
- Downloads a formatted PDF version of the complete RFQ
- Includes all general information, questions, and requested items
- Perfect for printing, sharing via email, or archiving
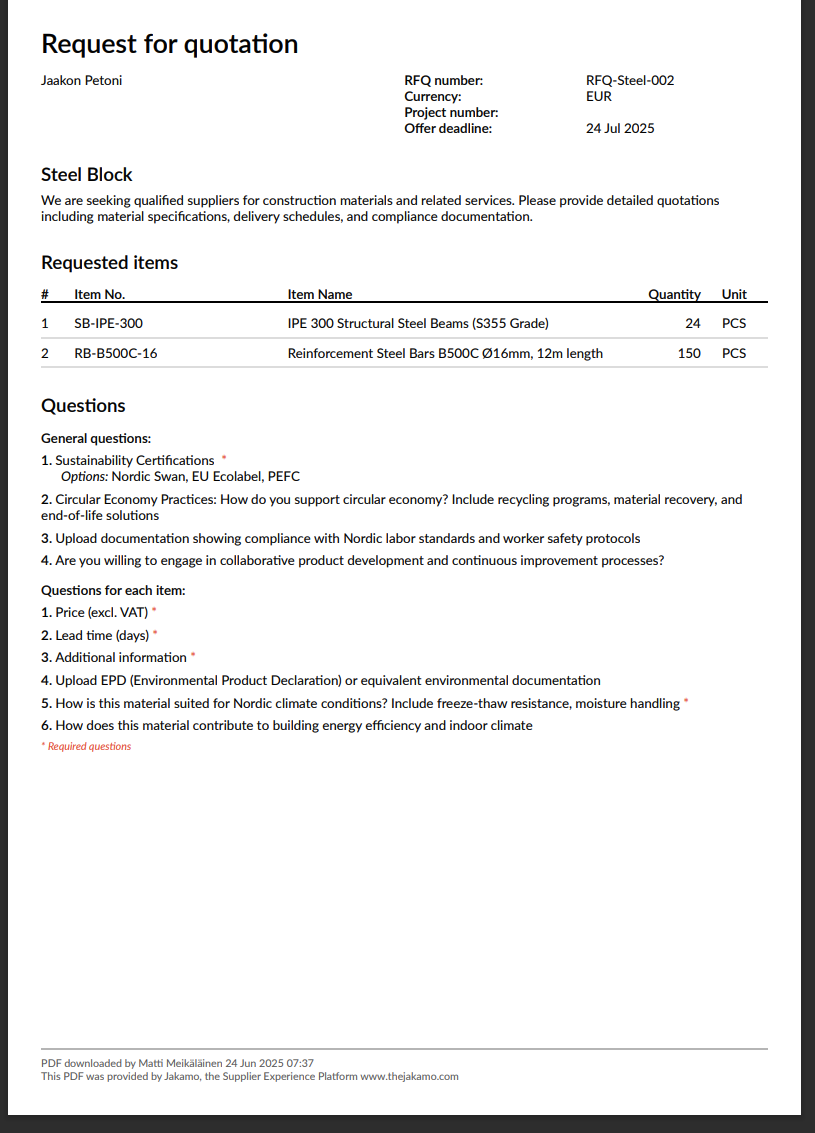
XLSX (Excel Download)
- Downloads a comprehensive Excel workbook with multiple tabs:
- General Information: RFQ details, deadlines, and contact information
- Questions: All RFQ questions organized for easy review
- Items: Detailed list of requested items with specifications
- Pricing: Template for entering your pricing information
- Attachments: Reference to any attached documents
Benefits of downloading:
- Offline review: Study the RFQ requirements without being online
- Team collaboration: Share with colleagues for input and pricing
- Internal processes: Integrate with your internal quoting workflows
- Backup: Keep a record of the original RFQ requirements
- Pricing preparation: Use Excel template to prepare pricing before entering online
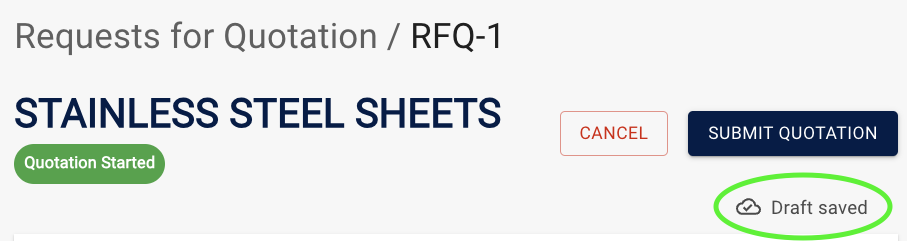
Starting Your Quotation
START QUOTATION to start creating your offer!In order to start making an offer, the supplier first have to click START QUOTATION. Before that, questions cannot be filled, only viewed.
Once you've reviewed the RFQ (either online or via downloaded files), click START QUOTATION to begin responding. This will:
- Change your status to Quotation started
- Enable question and pricing input fields
- Allow you to save draft responses
Additional Options
DECLINE: If you cannot participate in this RFQ, click DECLINE to notify the customer immediately. This helps them plan accordingly and maintains good business relationships.
Discussion with buyer: The supplier may also start discussion with customer from the bottom of RFQ overview page to talk directly to the person who has released the RFQ from customers side. Use this for example:
- Clarifying technical requirements
- Requesting additional information
- Confirming specifications
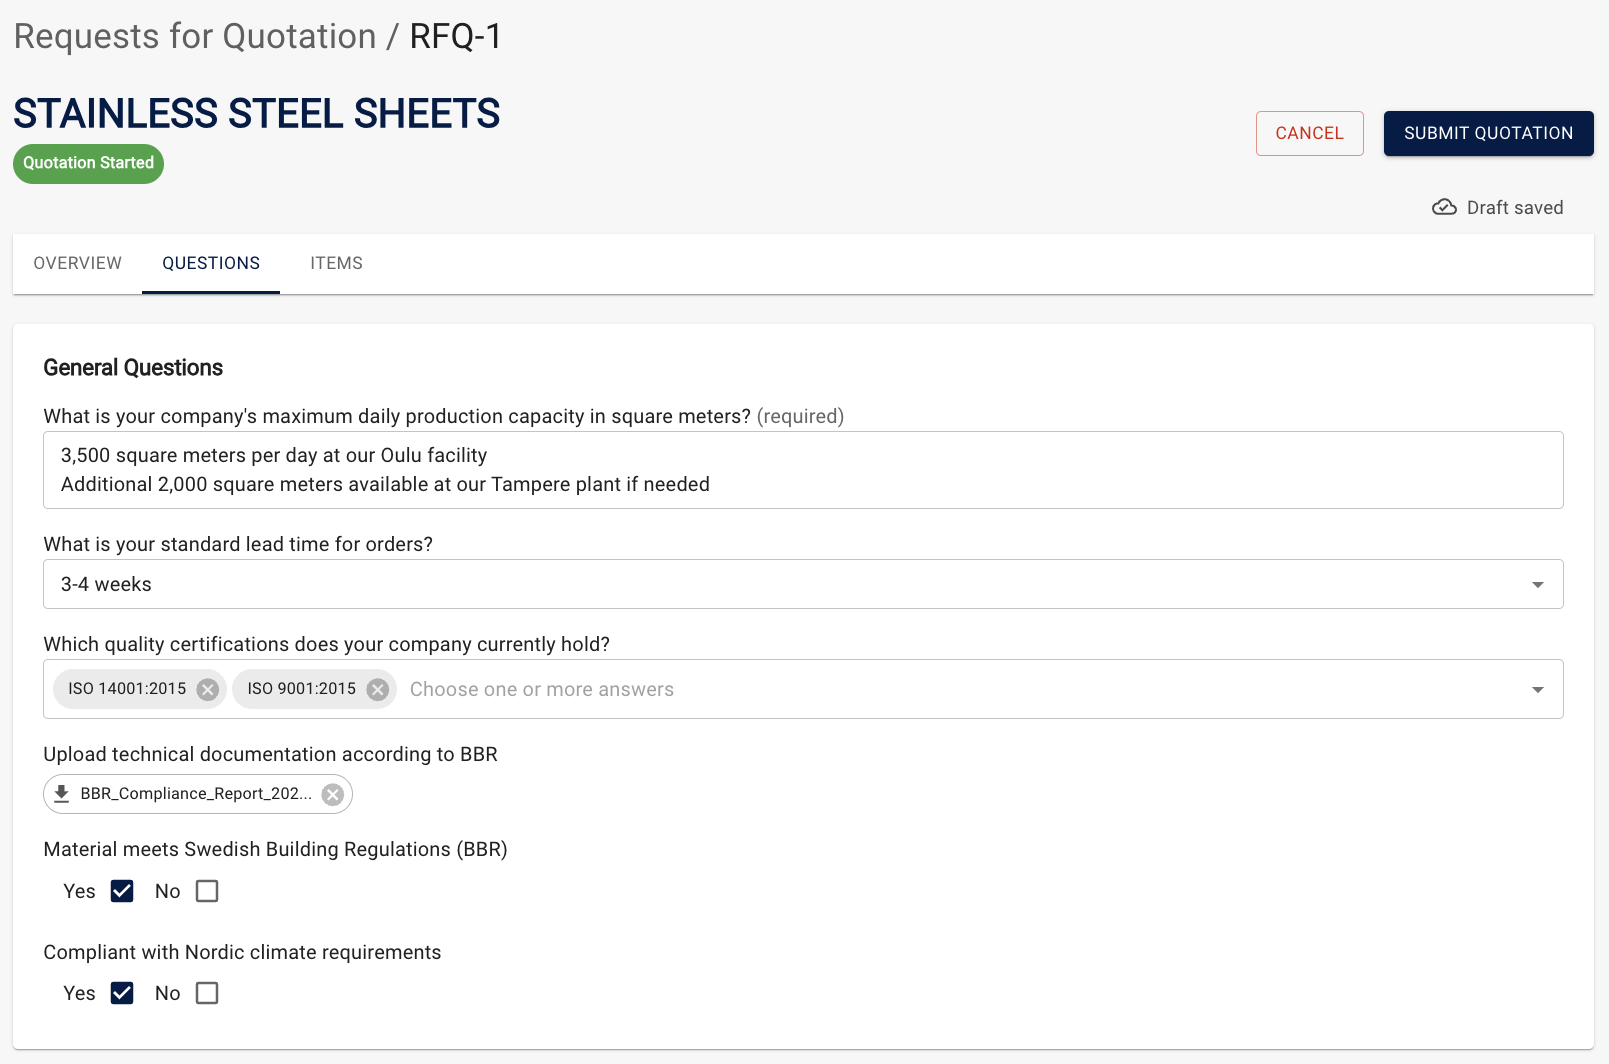
3.2 Supplier answer the questions
In the Questions tab supplier may fill the questions the customer has requested for their RFQ:
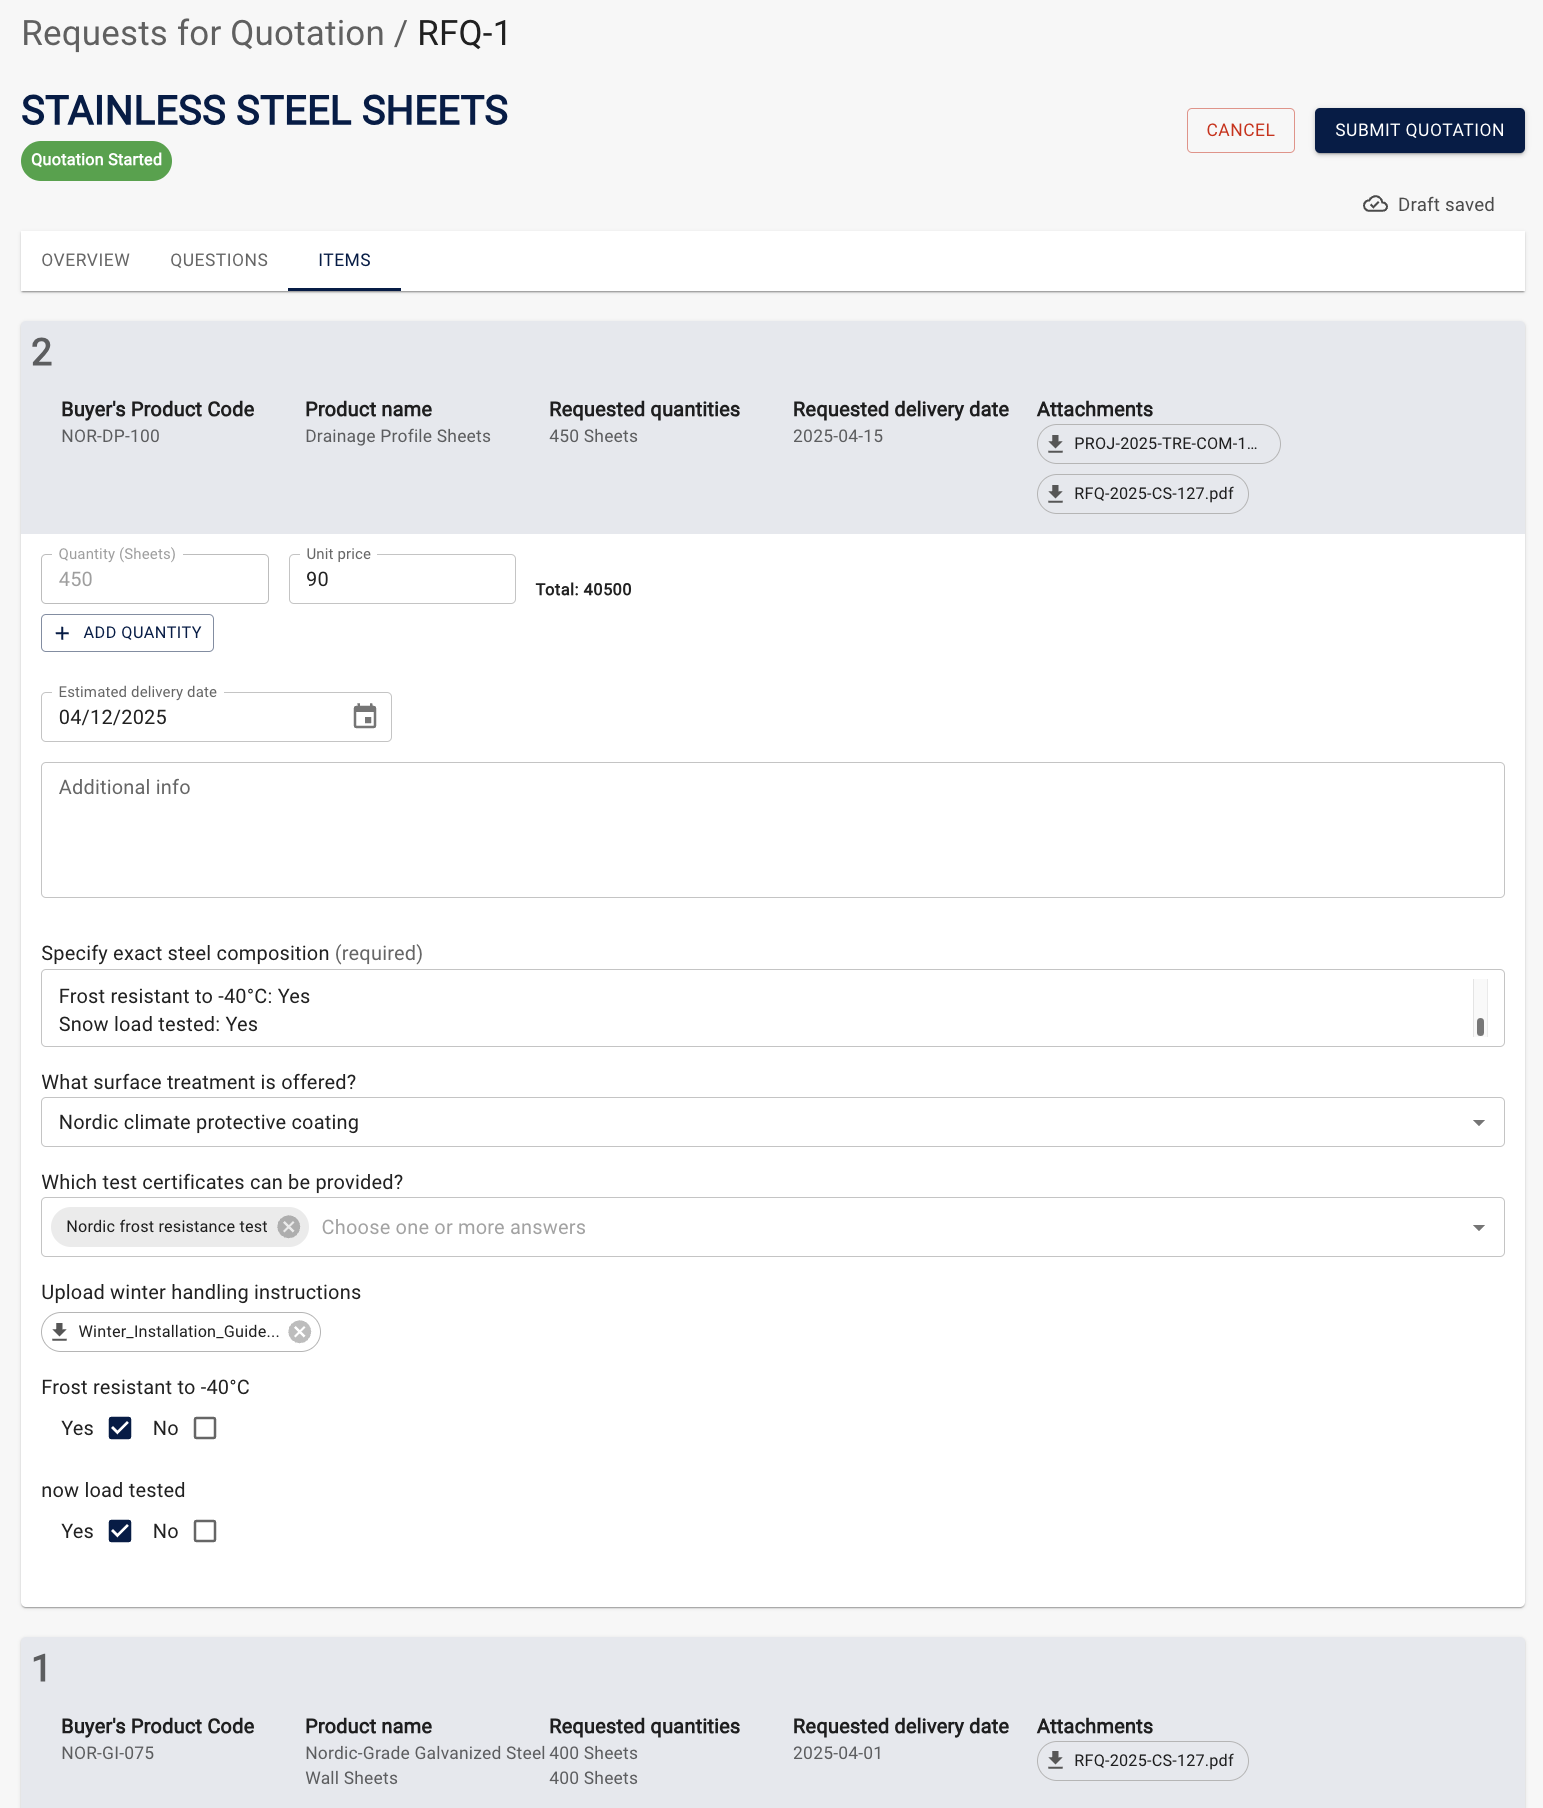
3.3 Supplier fills the item details
In the Items tab the supplier may fill the information and answer requested questions the customer has requested for each quotation line:
3.4 Publish an offer
After supplier has filled all the requested information, publish offer by hitting Submit Quotation on the top-right in order to share your offer with customer.
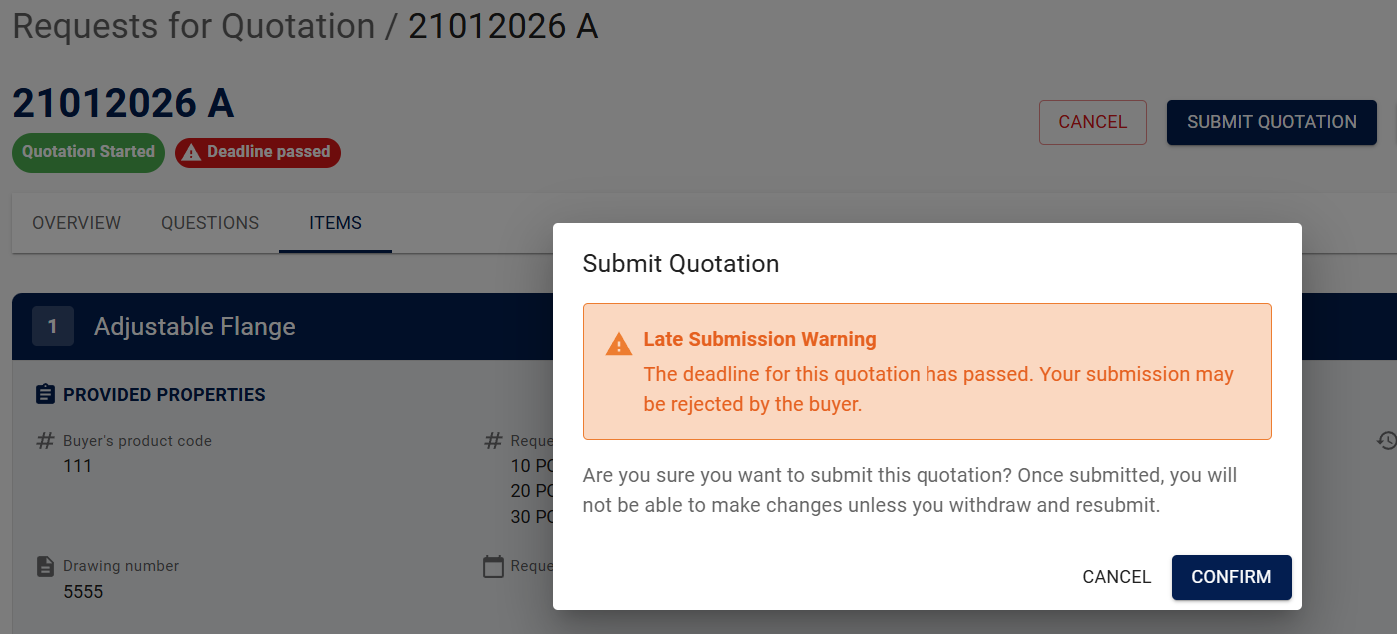
Submitting quotation after RFQ deadline
Customer defines deadline date for submitting offers. Suppliers may still submit their offers after the deadline, but their offer will be marked as a late submission.
Jakamo will notify supplier if offer is subitted late with warning:
3.5 Edit published offer
The supplier may still withdraw from the quotation at this phase if they see it necessary by selecting Withdraw quotation.
4. Compare and award offers
Customer can compare and award received offers in Jakamo. Once suppliers have submitted their quotations, you can access the comparison functionality through the RFQ's Suppliers tab by clicking VIEW RESPONSES.
4.1 Offer Comparison Overview
The offer comparison page provides a comprehensive overview of all received responses:
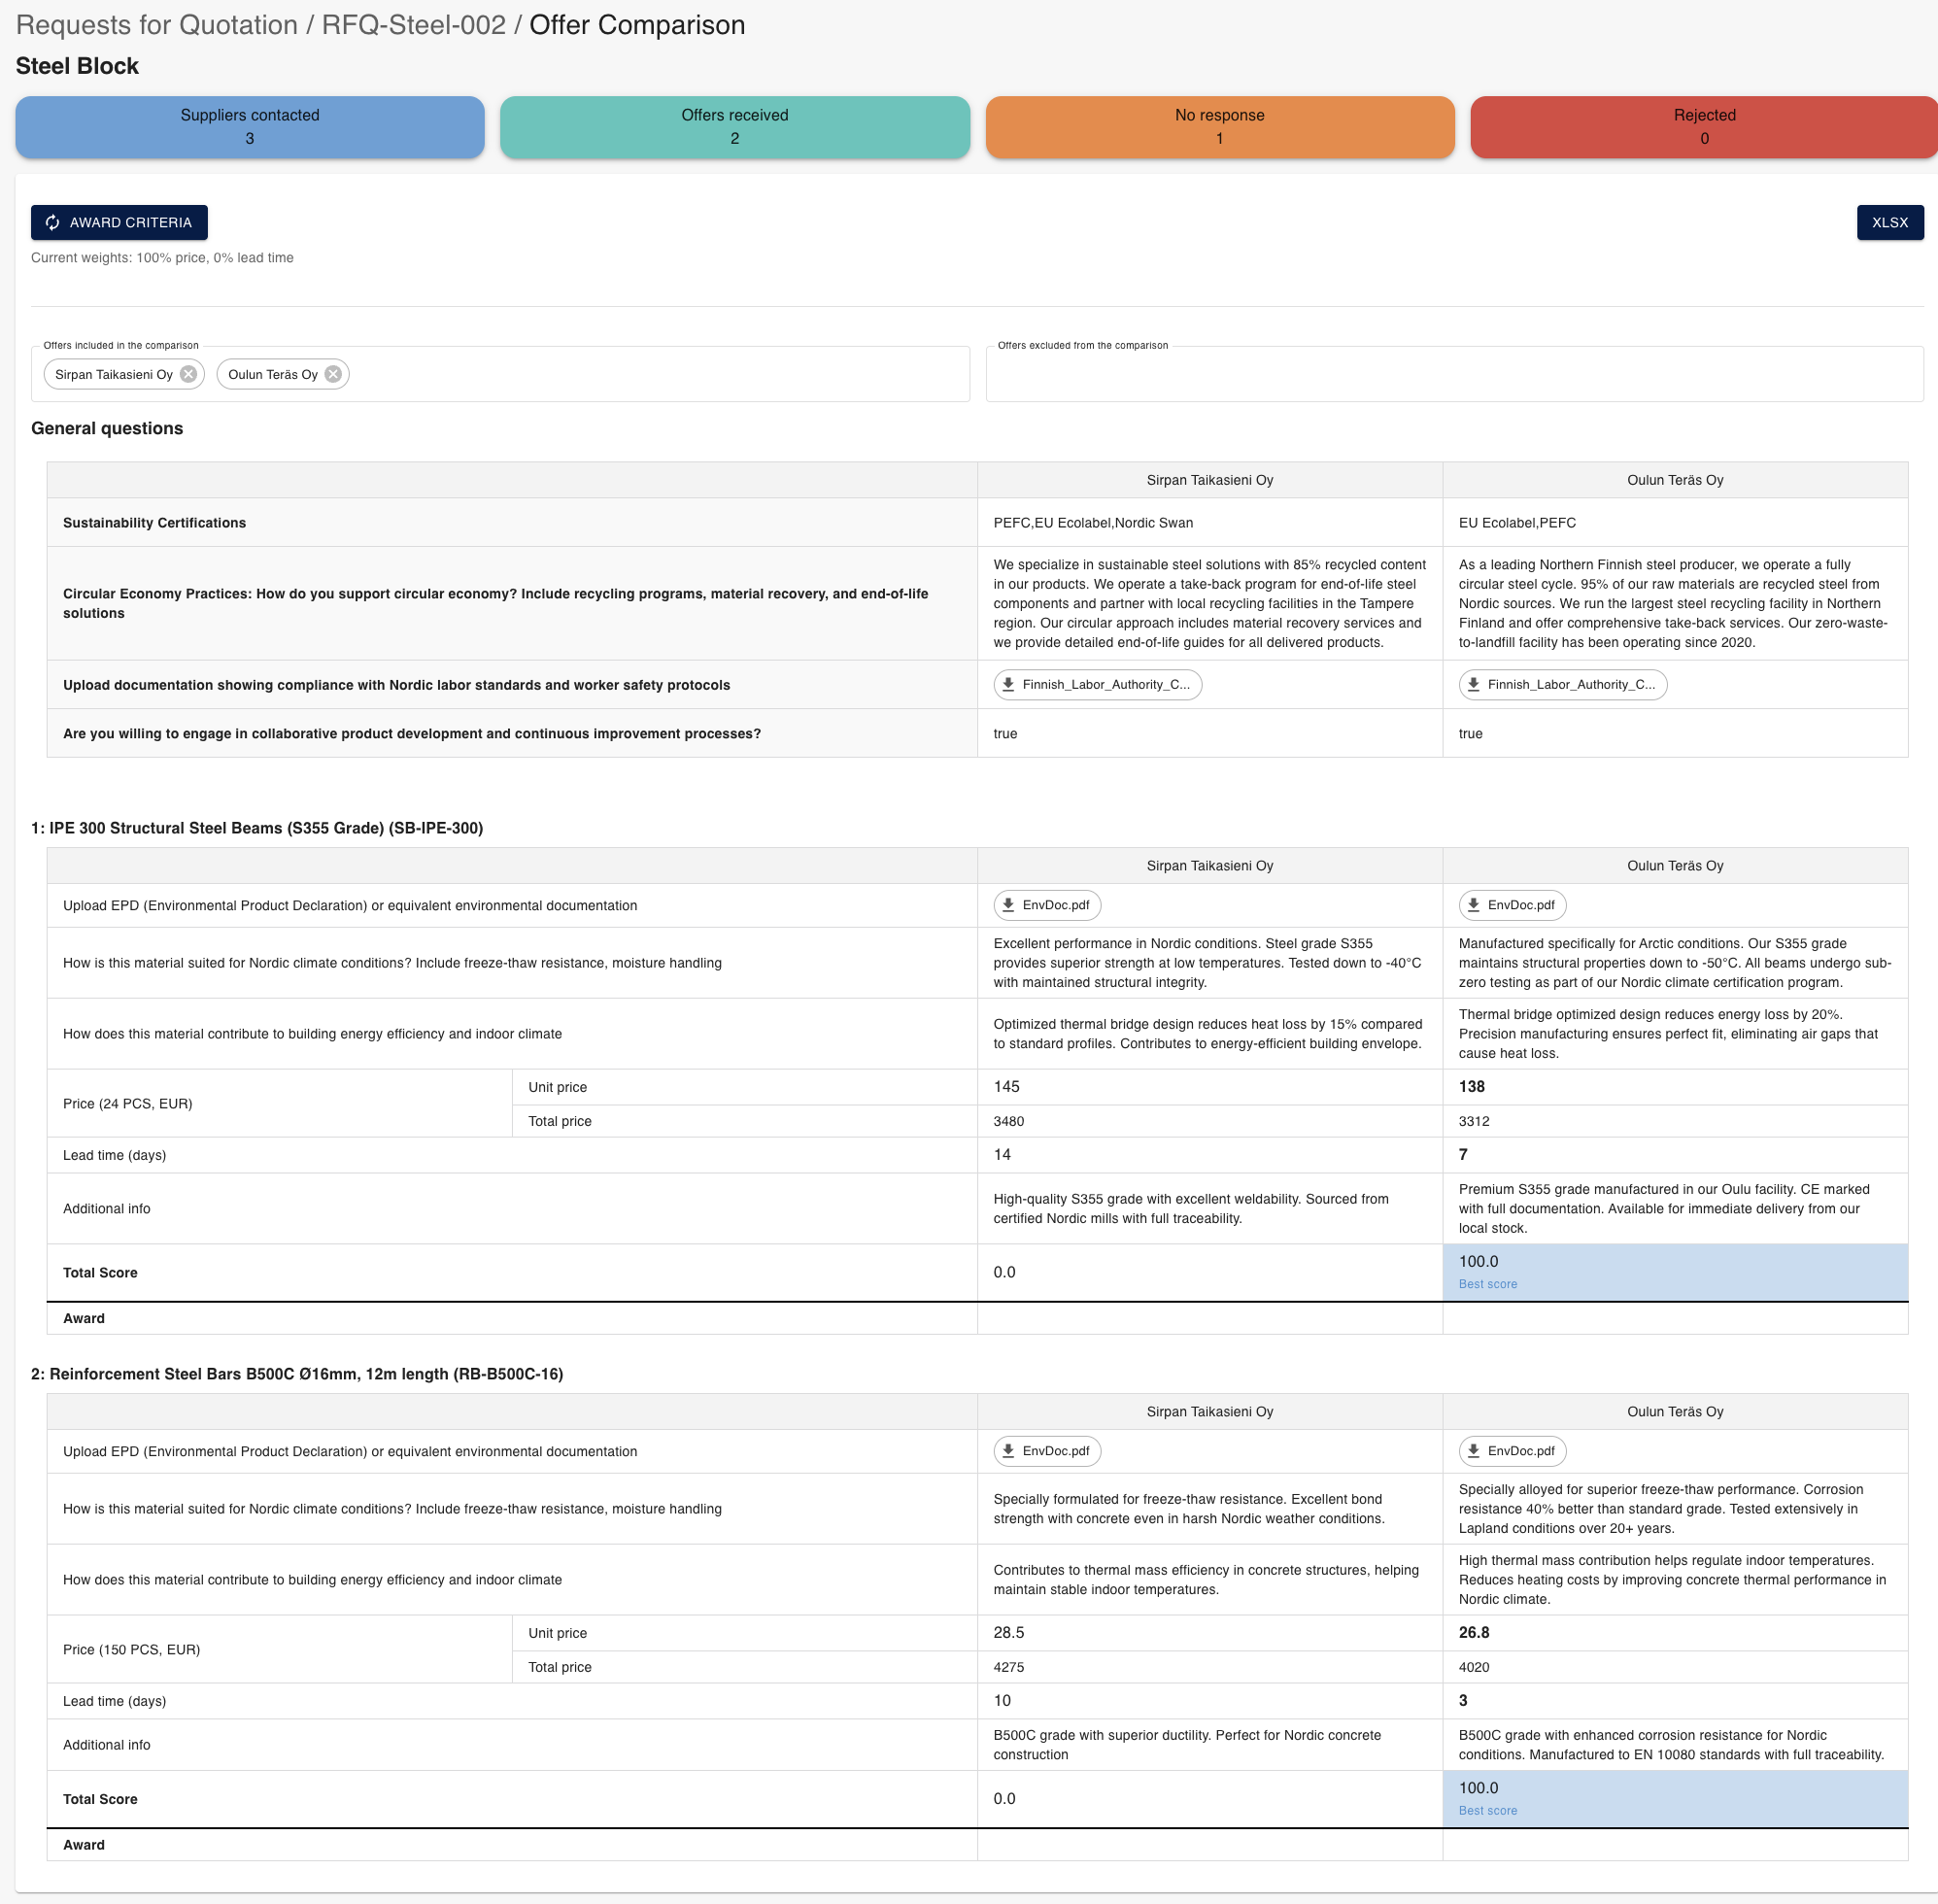
Key metrics displayed:
- Suppliers contacted: Total number of suppliers invited
- Offers received: Number of submitted quotations
- No response: Suppliers who haven't responded
- Rejected: Suppliers who declined to participate
4.2 Comparing Supplier Responses
The comparison interface allows you to review all supplier responses side by side:
Comparison features:
- General questions: Compare sustainability certifications, compliance documentation, and collaboration willingness
- Item-specific responses: Review pricing, lead times, technical specifications, and additional information
- Attachments: Access uploaded documents like EPDs, certificates, and technical documentation
- Visual highlighting: Easy identification of key differences between suppliers
4.3 Excel Export for Detailed Analysis
For thorough analysis, export the comparison to Excel:
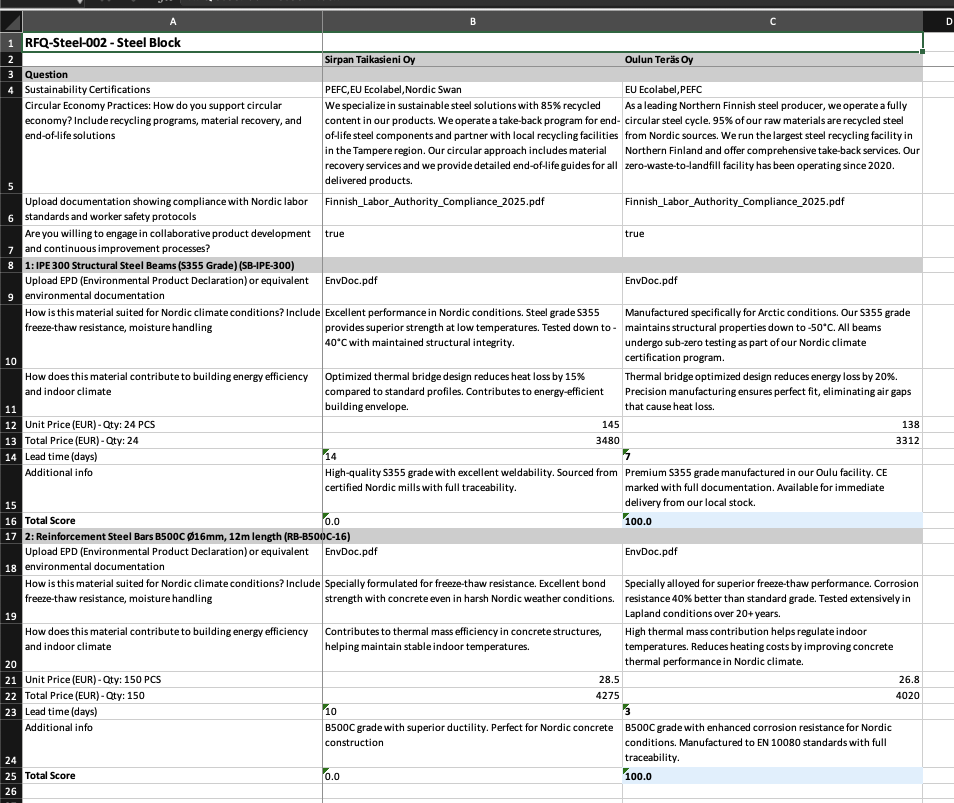
Excel comparison benefits:
- Side-by-side format: All supplier responses in adjacent columns
- Complete data: Questions, answers, pricing, and additional information
- Offline analysis: Share with stakeholders for review and decision-making
- Filtering and sorting: Use Excel tools for detailed analysis
4.4 Award Configuration
Before awarding, configure your evaluation criteria using the AWARD CRITERIA button:
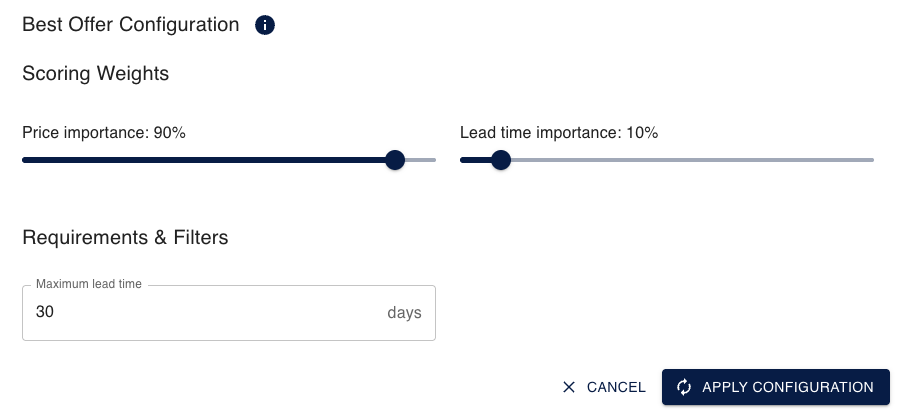
Scoring Weights:
- Price importance: Set the weight for price considerations (0-100%)
- Lead time importance: Set the weight for delivery time (0-100%)
- Total weights must equal 100%
Requirements & Filters:
- Maximum lead time: Set acceptable delivery timeframes
- Other criteria: Define additional filtering requirements
Click APPLY CONFIGURATION to update the comparison with your weighted scoring.
4.5 Awarding Suppliers
After analysis, award individual items to your preferred suppliers:
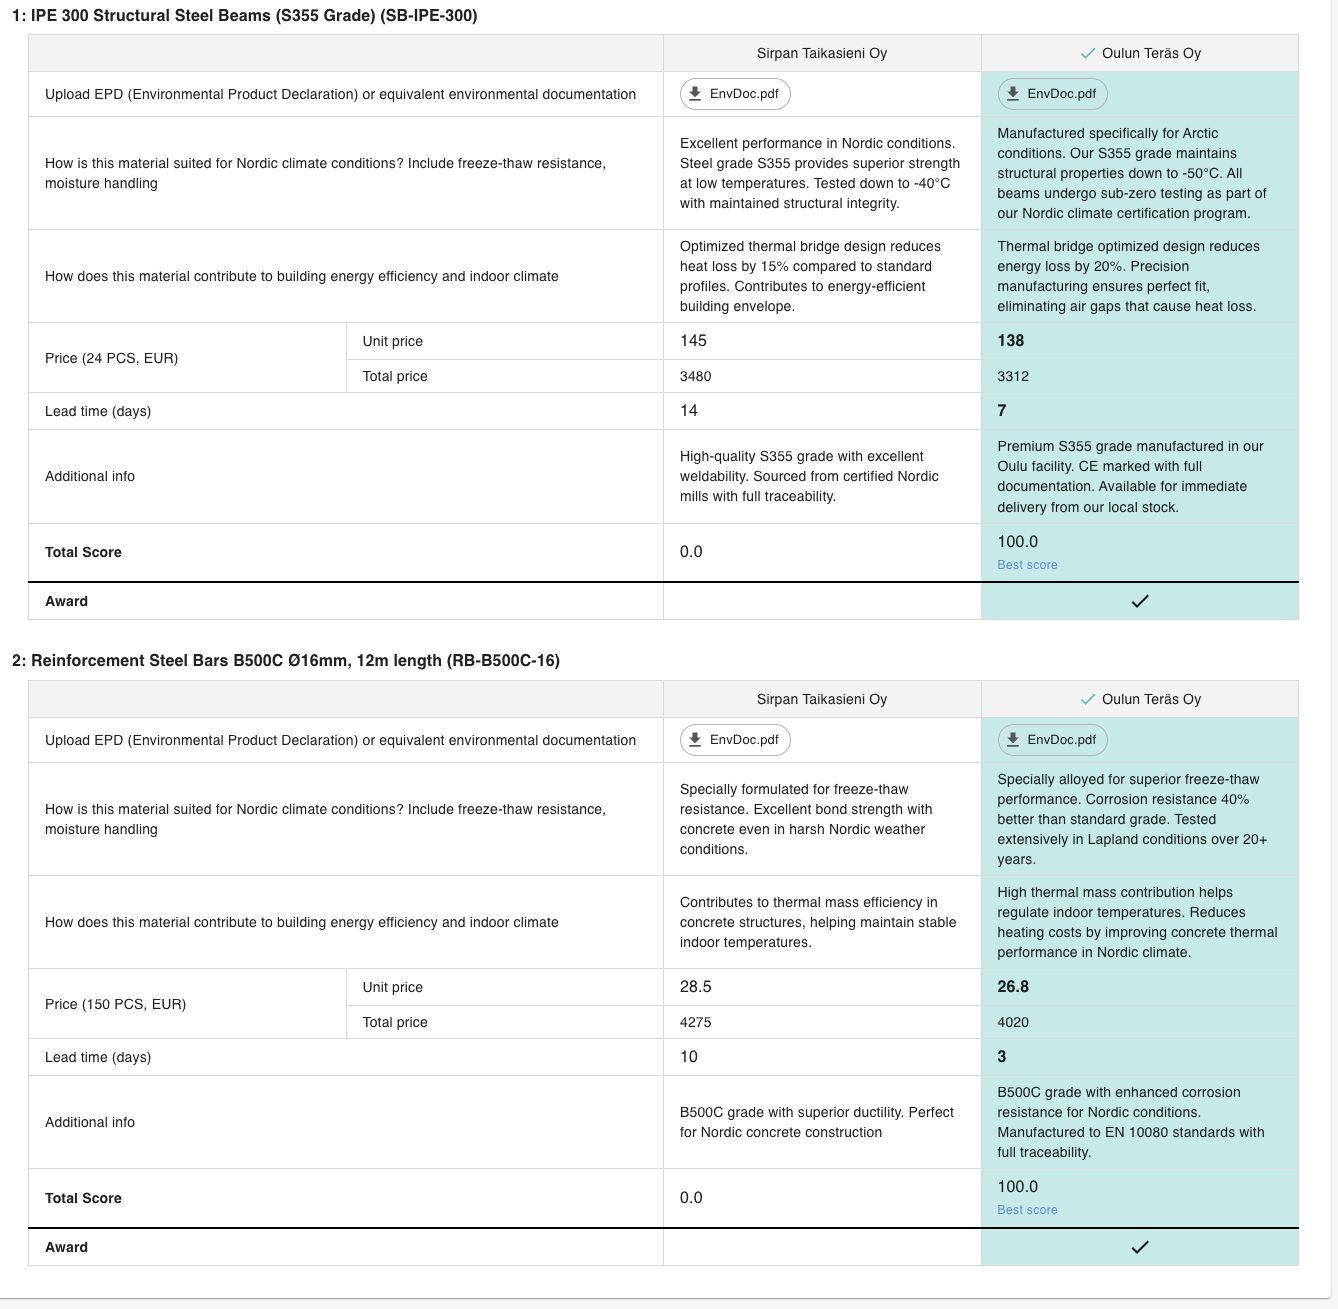
Award process:
- Item-level awards: Award each item separately to different suppliers if desired
- Visual confirmation: Awarded suppliers are highlighted in green/teal
- Award indicators: Trophy icons (🏆) show number of items awarded to each supplier
- Flexible selection: Mix and match suppliers based on their strengths per item
Awarding in the View responses view is for internal use only and is meant to highlight the best offer per RFQ line. To provide feedback to the supplier, open the supplier’s offer view and submit the awarding and feedback separately.
4.6 Feedback to Suppliers
Providing supplier‑specific feedback directly through Jakamo ensures that the supplier receives clear, structured and traceable information about how their offer performed.
Give feedback for supplier's offer by navigating to RFQ's Suppliers tab and selecting supplier's offer from the View. Scroll down the page and you can find Supplier feedback section.

Select Send feedback which will open the feedback form.
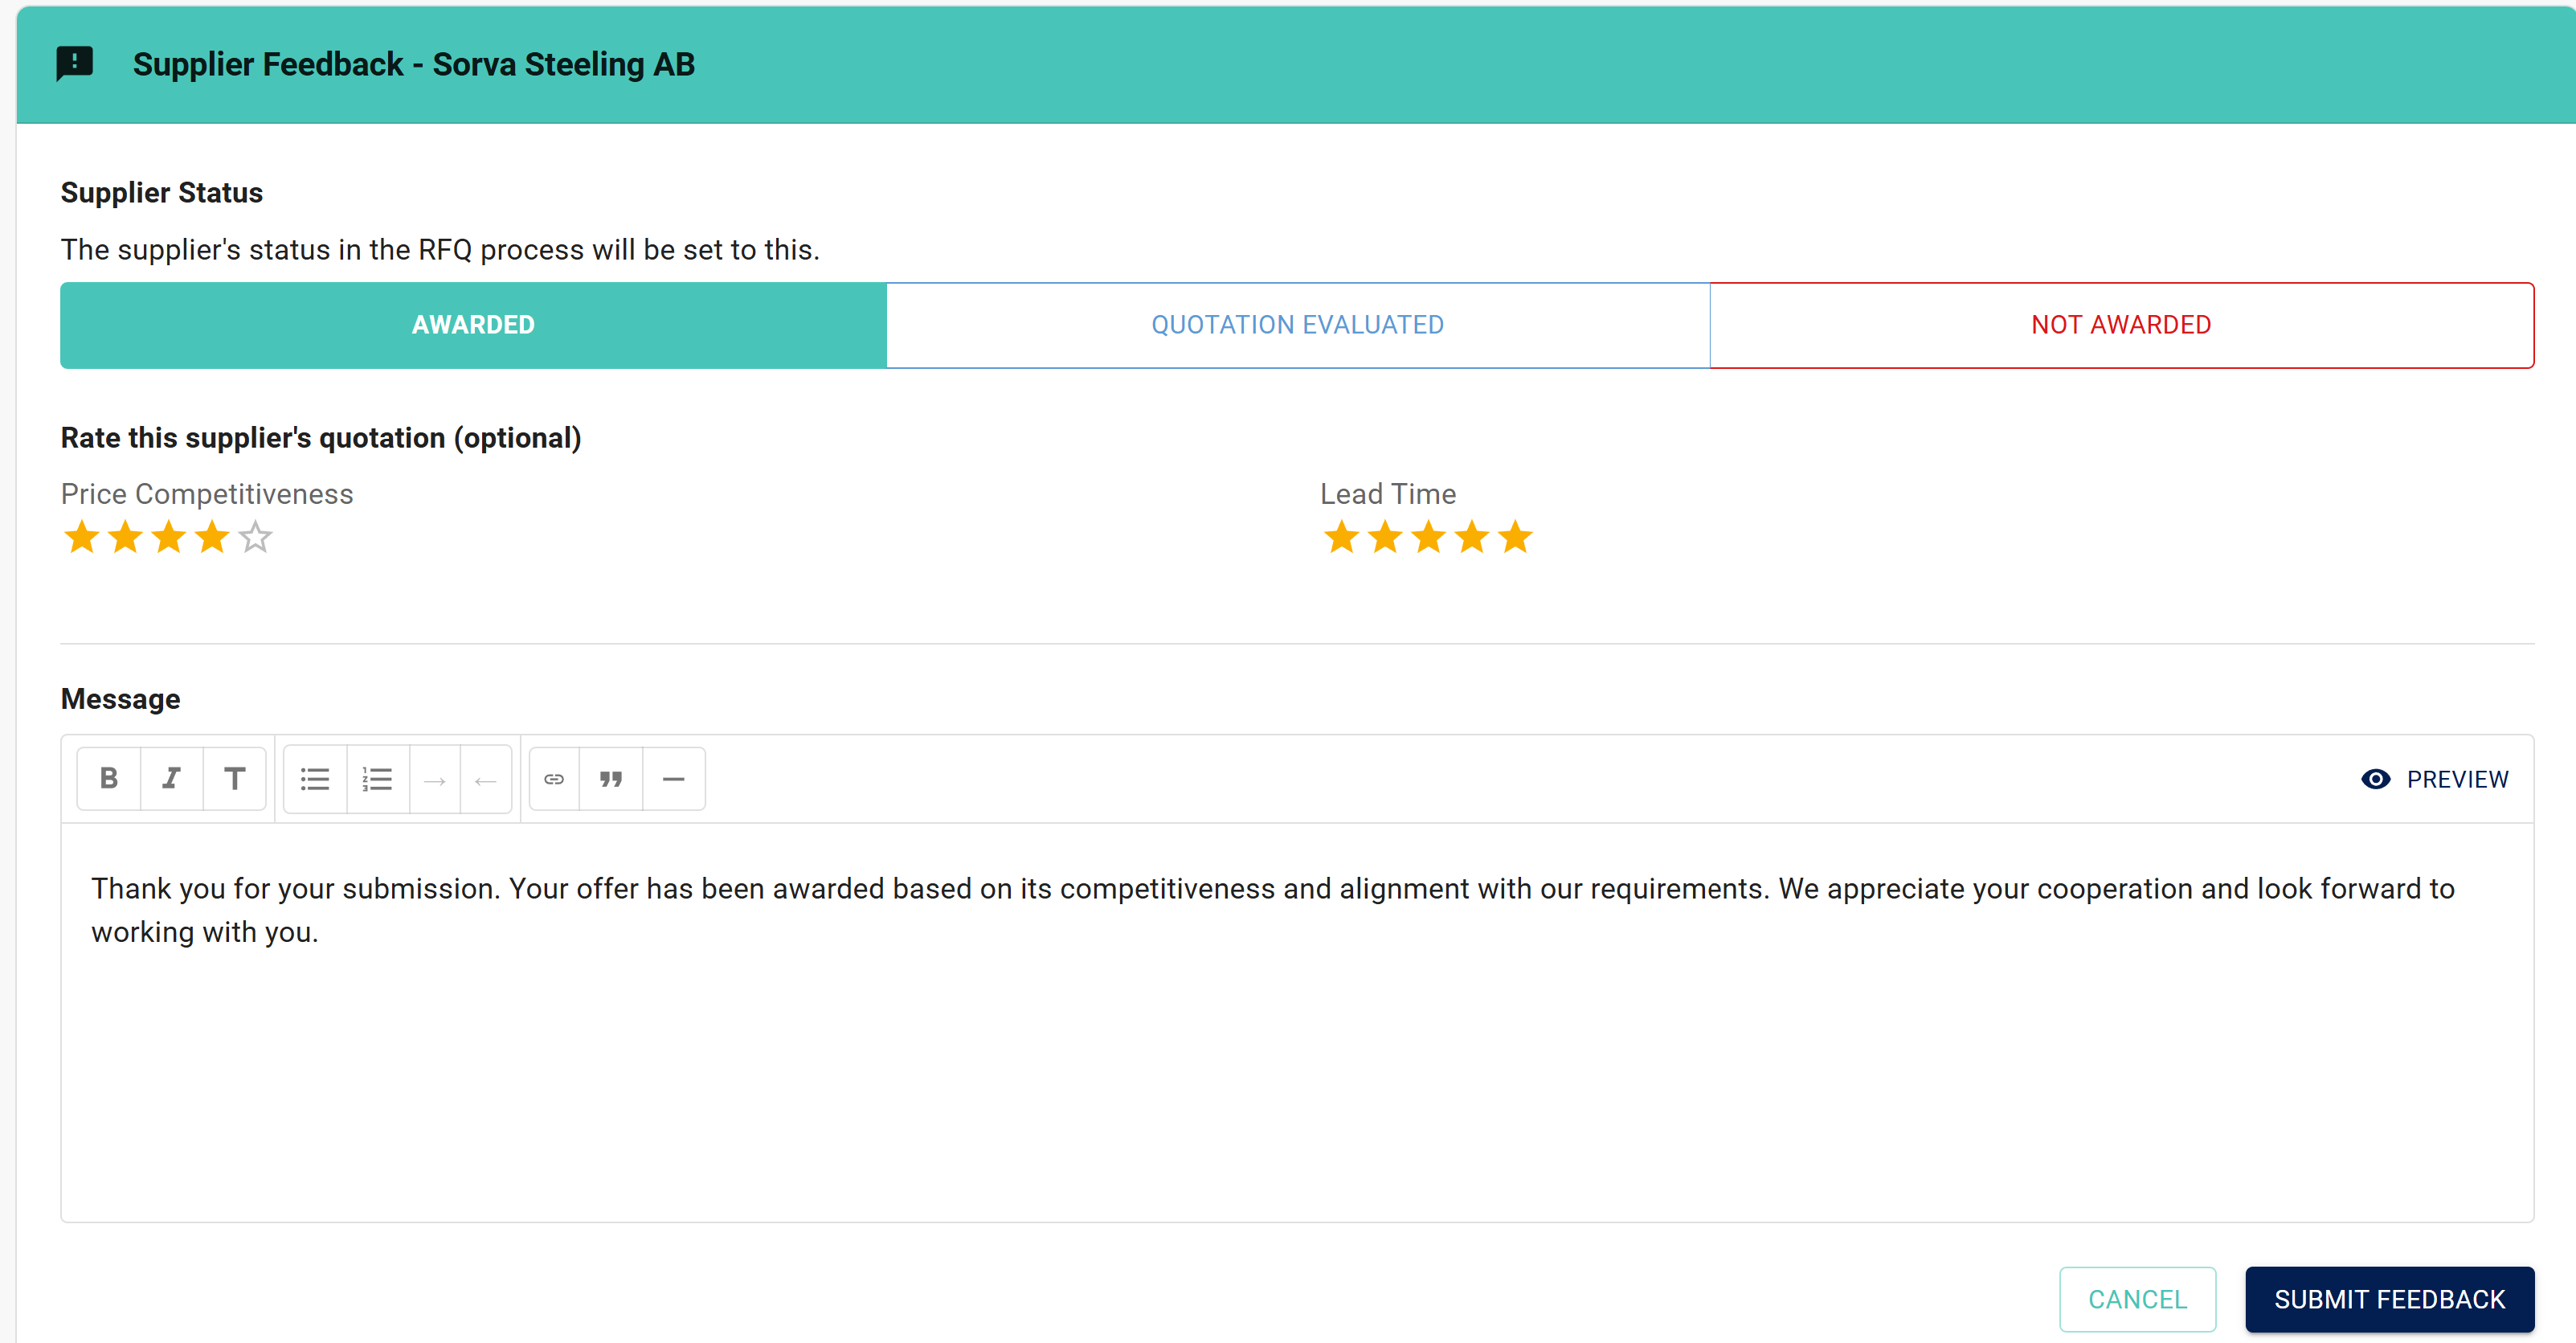
Supplier status
Award supplier's offer and select the status of their offer:
- When a supplier is awarded, the offer status is automatically updated to Awarded.
- If the supplier is not selected, the offer status is updated to Not Awarded.
- If you only want to record an internal evaluation without awarding, you can select Quotation Evaluated.
Rate supplier's quotation
Provide an indicative evaluation of the supplier’s performance in terms of price competitiveness and lead time by giving a rating from 1 to 5 stars.
Message
Write any additional feedback you want to share with the supplier regarding their quotation.
Send your awarding and feedback by selecting Submit Feedback.
4.7 Completing the RFQ Process
Once awards are made, complete the RFQ process:
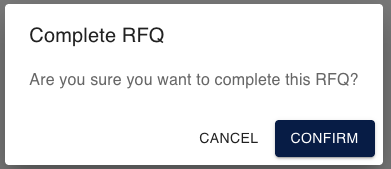
Complete RFQ:
- Finalizes all awards and supplier selections
- Locks the RFQ from further modifications
- Triggers notifications to awarded and non-awarded suppliers
- Changes RFQ status to Completed
4.8 Archiving RFQs
For completed RFQs that are no longer actively managed:
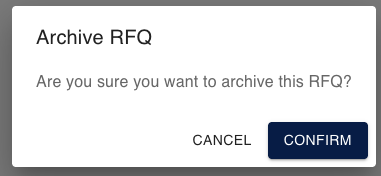
Archive functionality:
- Clean workspace: Removes RFQ from main active list
- Preserved data: All information remains accessible
- Filter access: Archived RFQs can be viewed through status filters
- Reversible: Archived RFQs can be restored if needed
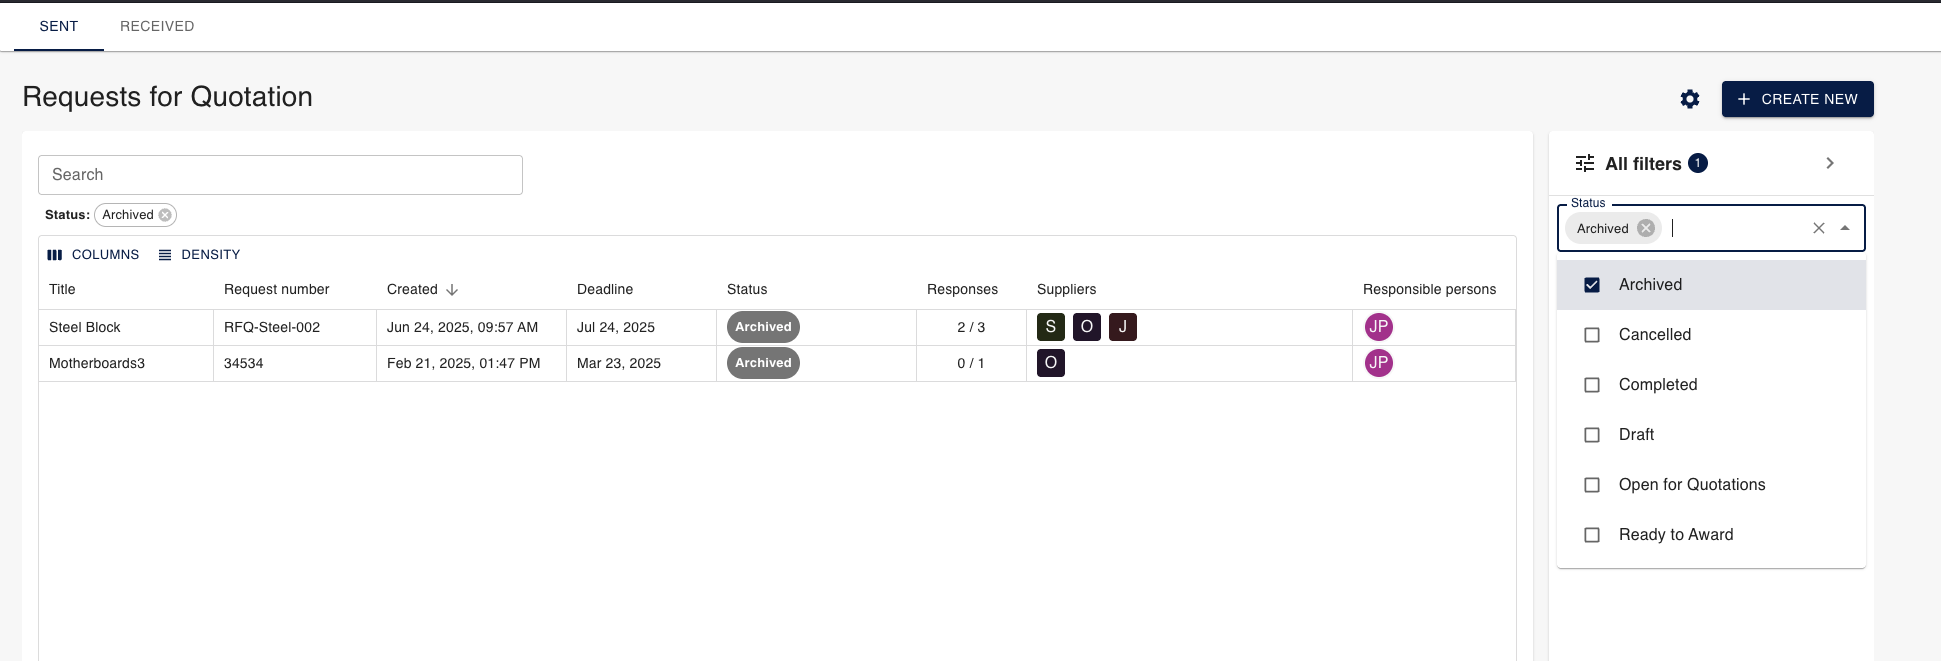
Finding archived RFQs:
- Go to the main RFQ list view
- Use the
All filtersmenu on the right - Select
Archivedfrom the Status filter - View all your archived RFQs
4.9 Best Practices for Comparison and Awards
Evaluation Tips:
- Use weighted criteria: Set price vs. lead time importance based on project needs
- Review all responses: Consider sustainability practices and collaborative approach, not just price
- Document decisions: Export to Excel for stakeholder review and audit trail
Award Strategy:
- Split awards: Award different items to different suppliers based on their strengths
- Consider total value: Sometimes higher-priced suppliers offer better long-term value
- Factor in relationships: Consider collaborative potential and past performance
- Lead time balance: Weight delivery speed against cost considerations
This comprehensive comparison and award system ensures you can make informed procurement decisions while maintaining clear documentation and communication with all participating suppliers.
5. Settings
The Settings in the list view allows you to customize your RFQ experience by creating reusable phrases, pre-defined templates and customized reminds that streamline your quotation process.
5.1 Phrases
Phrases help you maintain consistent communication throughout the RFQ process. You can create both personal phrases (for your own use) and common phrases (shared across your organization).
Access the Phrases settings by navigating to Settings > Phrases in the RFQ application.
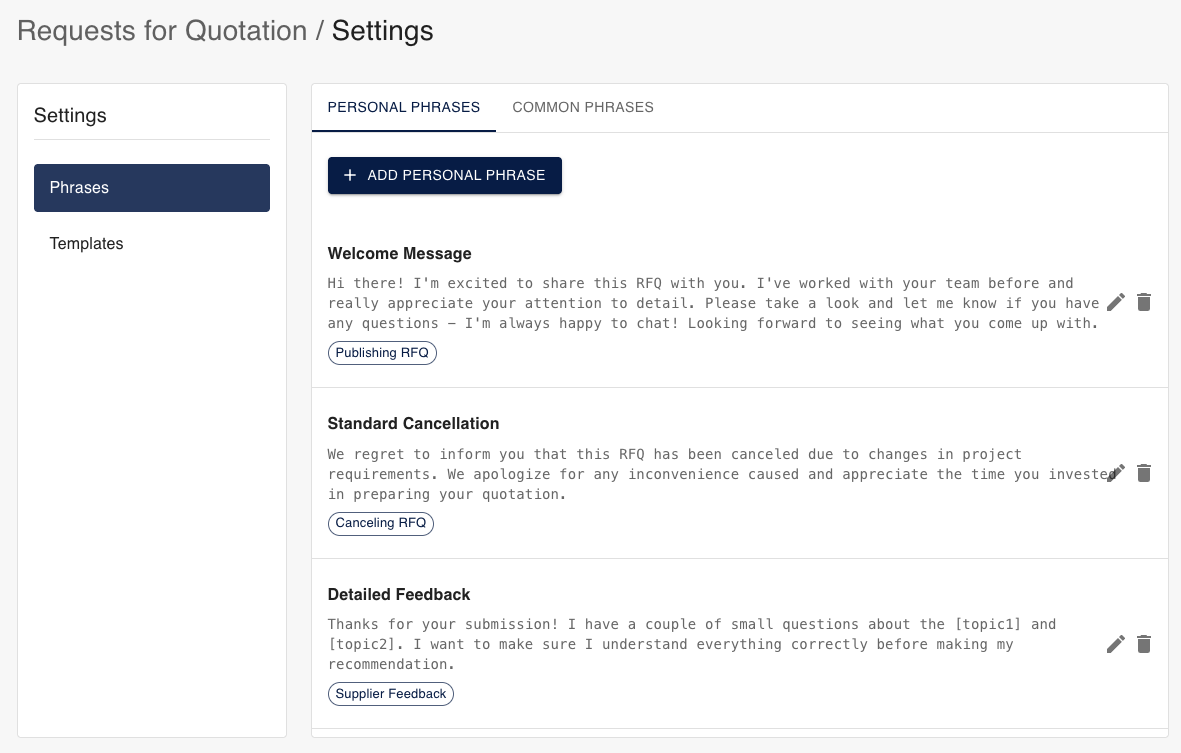
5.1.1 Personal Phrases
Personal phrases are private to your account and can be used in various stages of the RFQ process. Click + ADD PERSONAL PHRASE to create a new phrase.
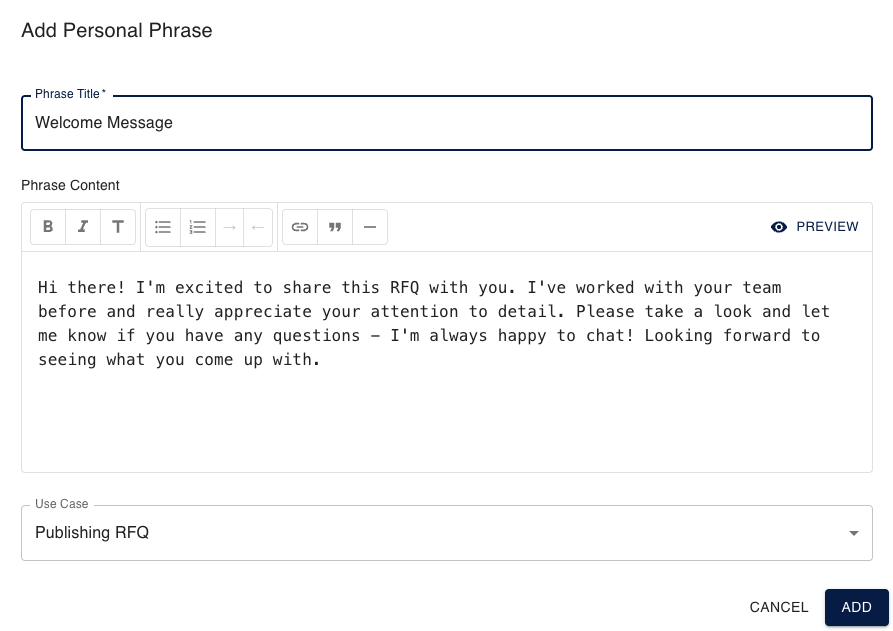
When creating a personal phrase, you need to:
- Phrase Title: Give your phrase a descriptive name
- Phrase Content: Write the actual text content with formatting options available
- Use Case: Select when this phrase should be used - options include:
- Publishing RFQ
- Canceling RFQ
- Supplier Feedback
5.1.2 Common Phrases
Common phrases are shared across your organization and can be used by all team members. These help maintain consistent company communication standards.
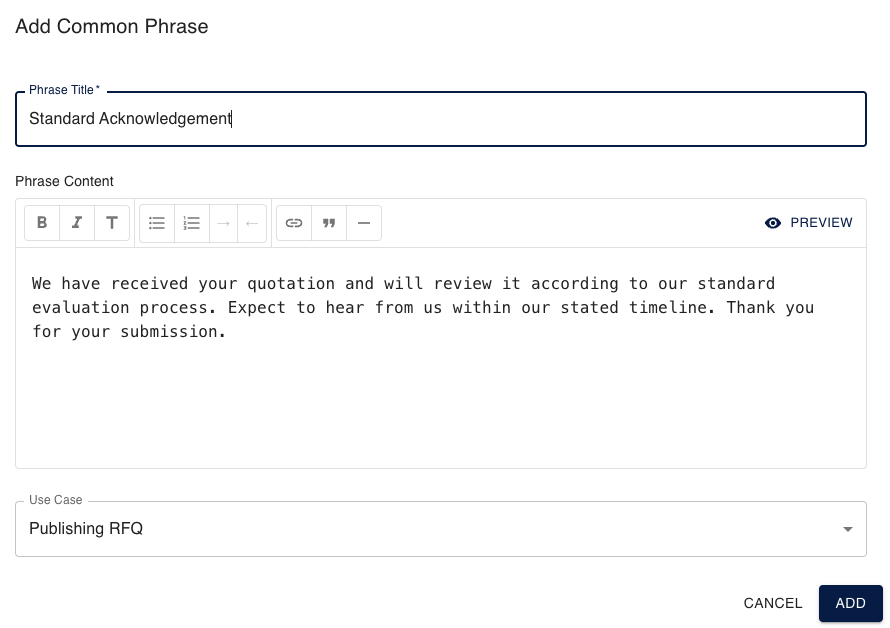
Similar to personal phrases, common phrases require:
- Phrase Title: A descriptive name for the phrase
- Phrase Content: The formatted text content
- Use Case: When the phrase should be applied in the RFQ process
5.2 Templates
Templates allow you to create standardized RFQ formats that can be reused for similar procurement needs. This saves time and ensures consistency across your organization's RFQs.
Access templates by navigating to Settings > Templates in the RFQ application.
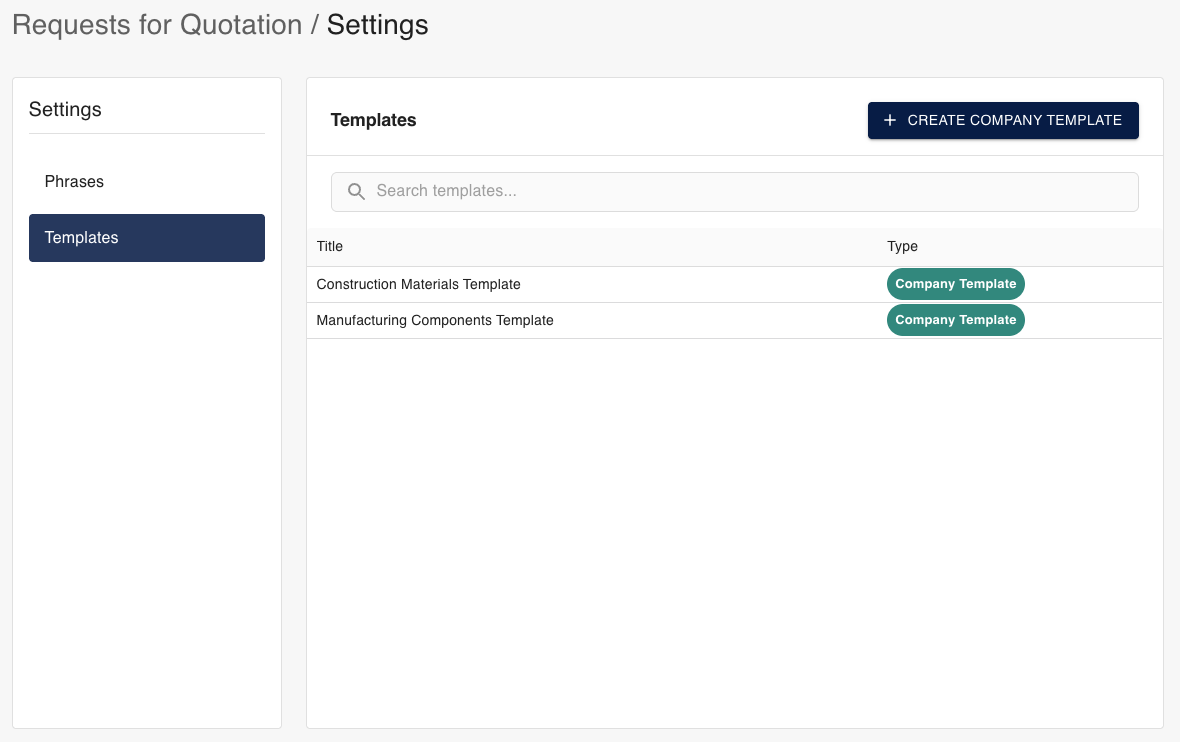
5.2.1 Template Permissions
Company templates can be viewed and used by all team members, but only users with admin rights can create or edit templates.
- View company templates in Settings > Templates
- Click
USE TEMPLATEto create a new RFQ from any template - Edit the resulting RFQ after creation
- Create new company templates
- Edit existing company templates
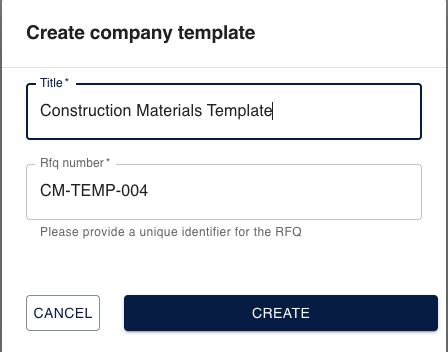
5.2.2 Creating Templates
Click + CREATE COMPANY TEMPLATE to create a new template. You'll need to provide:
- Title: A descriptive name for your template
- RFQ Number: A unique identifier for the template
Once a template is created, you can configure it with pre-defined content:
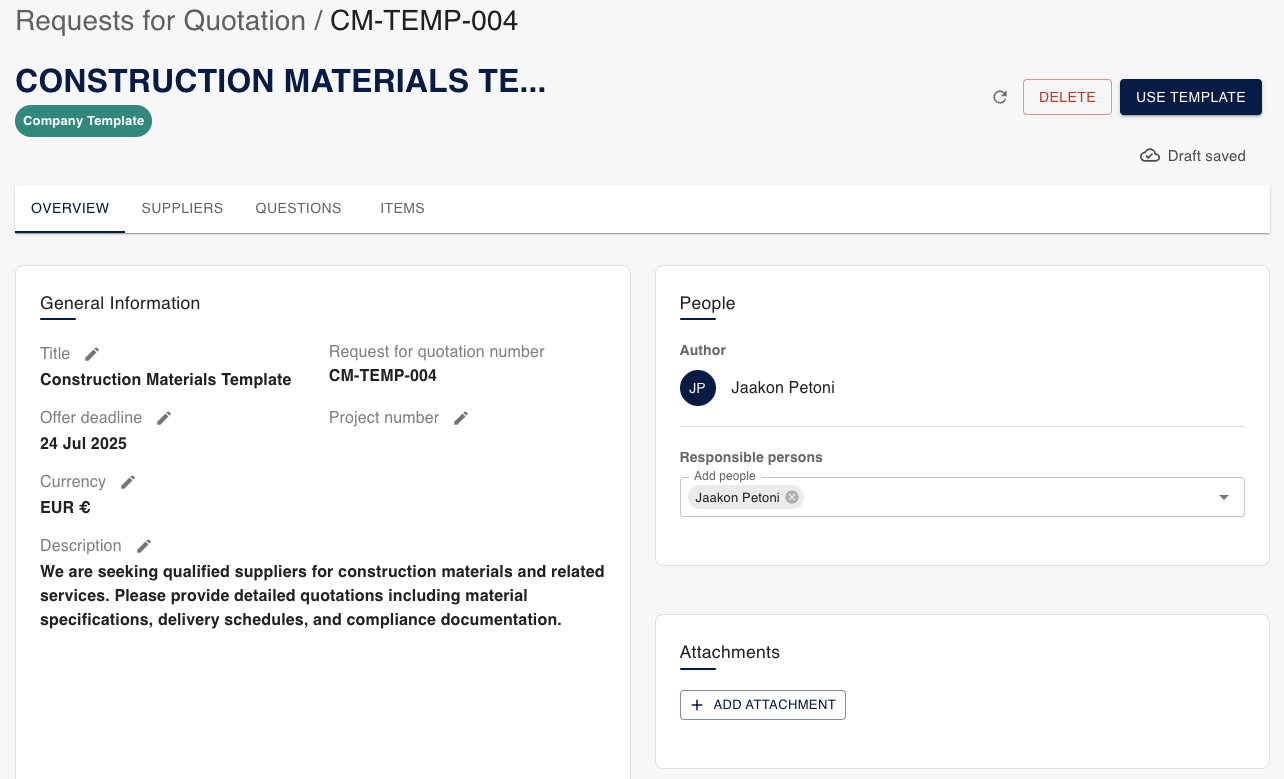
Template Structure:
- Overview: General information, description, people & attachements
- Suppliers: Suppliers to which the RFQ will be sent
- Questions: Questions for the whole RFQ in general and line questions for Items (for suppliers)
- Items: Items (including line attachments) that are requested from suppliers via this Jakamo RFQ
Once created, templates can be selected when creating a new RFQ from the main application. Templates help standardize:
- Pre-defined questions relevant to the category
- Standard evaluation criteria
- Common terms and conditions
- Typical delivery requirements
This standardization helps ensure you don't miss important requirements and makes the evaluation process more consistent across similar RFQs.
5.2.3 Using Templates
When creating a new RFQ, you can select from available templates in the Templates dropdown:
5.3 Reminders
Didn't you find what you were looking for? Send email to Jakamo support (support@thejakamo.com) and we will help you.